


Has your precious DVD, recording of the wedding, children’s growth, or any other unforgettable moments, ever been damaged? What will you do if you want to share interesting films on a DVD with others?
Many people have gotten into the dilemma of having no idea how to copy DVD to DVD nowadays. Actually, DVD-to-DVD copying is a complex process, not to mention that some DVDs have copyright protection. But don’t be worried. This post will give you 4 smooth solutions that can handle all kinds of copying DVD-to-DVD tasks, no matter whether you want to copy a protected DVD or a private one. Besides, we’ll introduce a powerful DVD-to-DVD copy software, Videobyte DVD Copy, to you to solve the issue effectively.
Part 1. Basic Principles of Copying a DVD to Another DVD
How do you make a copy of a DVD? First, you need a DVD drive to recognize and read the data, like audio and video channels and other information on your DVD. Then, you need to use a tool, always a third-party software or a built-in program on your computer, to transfer all the data to another blank DVD.
If your computer has both a read and a write optical drive, you are lucky since you can get a copy of your DVD directly by writing the read data in a blank DVD. However, if your PC just has one optical drive, you need to back up the data of the previous DVD on your computer and then copy them into another DVD. Note that this process will take up some storage space on your computer's hard disk, so you need to ensure that there is sufficient storage space on your computer to successfully complete the replication.
In conclusion, copying DVD to DVD is a complex process, and you may be confused if something goes wrong at any point in the process. So, to copy a DVD effortlessly, we’ll introduce you to Videobyte DVD Copy, a powerful DVD-to-DVD copy software that can make this process easier and more effective. Read on to learn details.
Part 2. How to Copy DVD to DVD [Protected DVDs Also Supported]
VideoByte DVD Copy is specially designed for DVD movie lovers who want to back up their DVDs to prevent them from being damaged or lost. It can copy both homemade and commercial DVD discs to blank DVDs, ISO images, or DVD folders saved to a computer or hard drive at a 1:1 ratio. When it detects the protection on the disc, it will automatically remove it from the DVD disc after you finish copying DVD to DVD.
It takes great convenience to back up DVD movie discs for these DVD users. Better still, it has a trial version that offers 3 free chances to copy DVDs. As not all computers are equipped with discs, there are 2 types of DVD copying to tell you how to copy a DVD.
When there are 2 Disc Drives:
- Insert the source disc into a readable disc drive and insert the blank disc into a writable disc drive.
- Open VideoByte DVD Copy and choose the source and target.
- Copy the source DVD to the blank DVD.
When there’s 1 Disc Drive:
- As you only have 1 disc drive, you can copy your DVD to an ISO image file and then burn the ISO image to DVD. VideoByte DVD Copy can both do that for you.
Note:
- Make sure your disc drive is recordable and writable.
- Policies on copying DVD discs are different from country to country. Before you try to copy DVD to another DVD disc or computer, make sure you’re not against the local laws.
- This post aims to provide effective but simple solutions for copying DVD discs that we’ve already owned for private use only. And it’s not recommended to copy rented or borrowed DVD discs for the purpose of commercial profit.
How to Copy a DVD to Another DVD with VideoByte DVD Copy
Before you go, make sure you get the above items ready and start copying DVDs to DVDs.
Step 1. Launch VideoByte DVD Copy
Install the VideoByte DVD Copy on the computer and then launch it. Next, insert your source disc into the disc drive. If you have 2 disc drives, you can insert the blank disc into another drive.
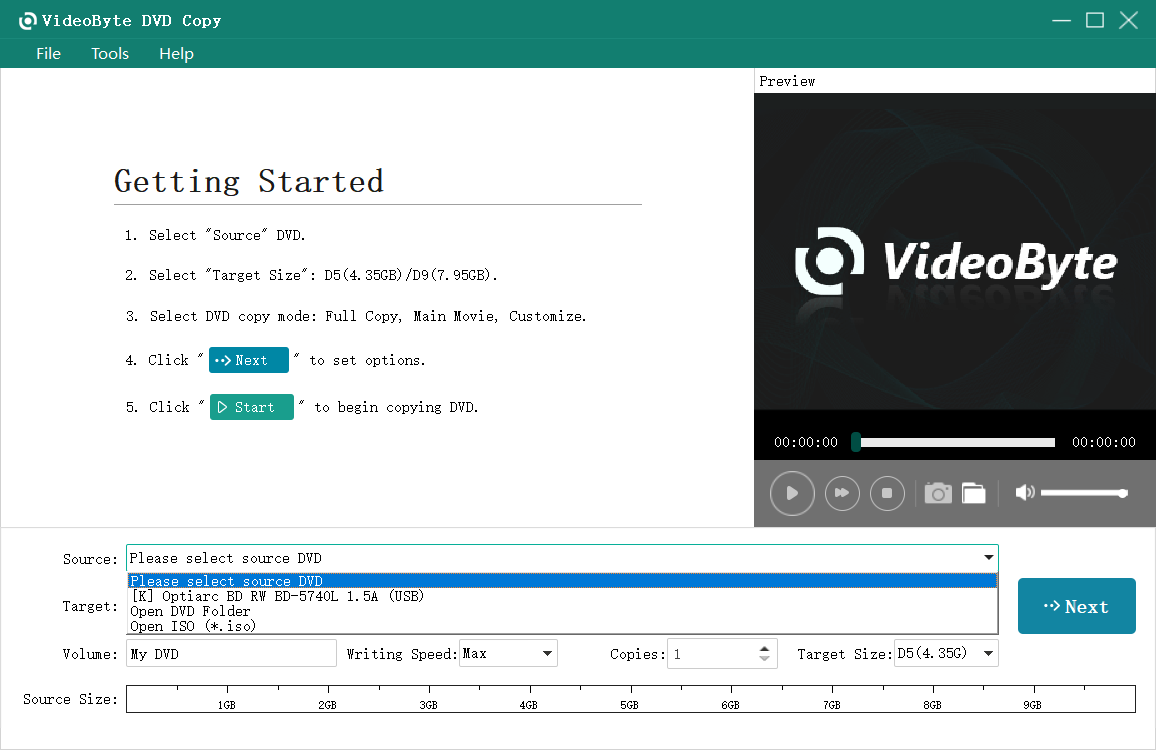
Step 2. Import Source/Set Target
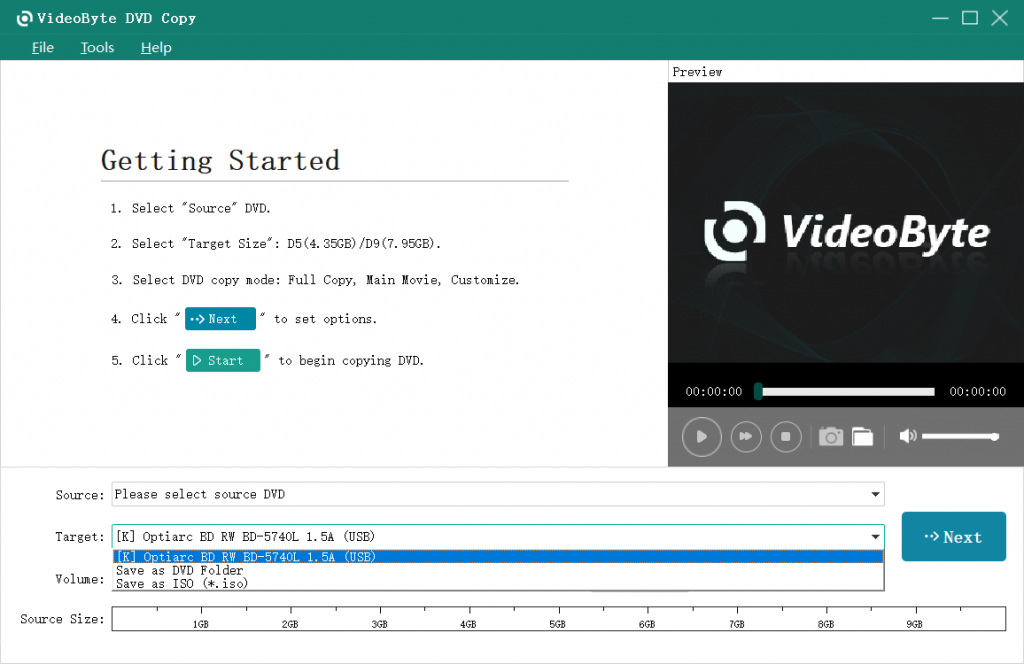
Now from the “File” > “Select Source” to choose the source DVD disc. Then choose “Select Target” to set the output file. You can choose the disc drive which includes the blank disc. If you only have 1 disc drive, you need to choose the ISO image file as your output first.
Step 3. Copy DVD to DVD
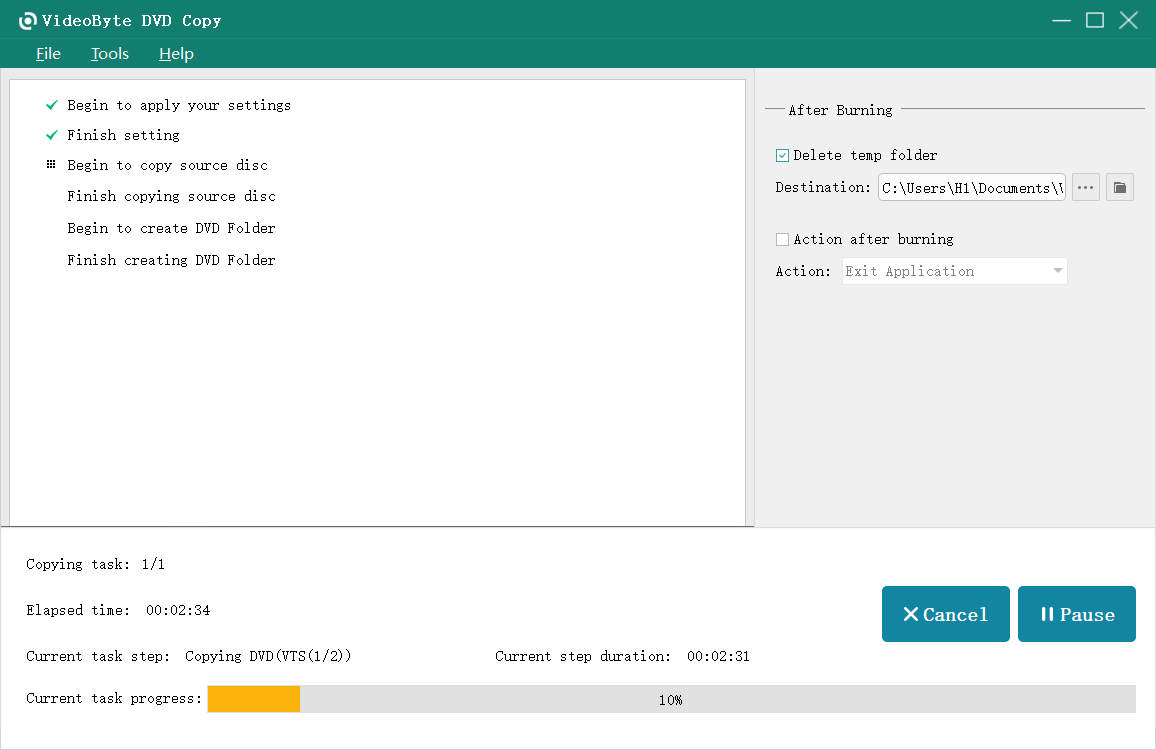
To keep the 1:1 original quality, you’d better select “Full Movie” from the copy mode options. Then click on “Next” > “Start” to duplicate your DVD movie disc. Usually, it will take some time to finish the copy. You can do other things, and the program will get everything done.
Step 4. Burn ISO to DVD (For 1 Disc Drive)
If you only have 1 drive, you need one more step – burn the ISO image to DVD. Insert a blank disc to your disc drive and repeat Step 1 to Step 3. Please note that here you need to choose your ISO image file as the Source and the blank disc as output.
Now you probably learned how to copy your DVD to DVD with VideoByte DVD Copy. If you still have problems, contact the support team, and they will help you solve them.
Part 3. How to Make Copies of DVD on Windows with ImgBurn [Easy]
If you have a Windows PC and are looking for free DVD-to-DVD copy software, ImgBurn is the solution for you. ImgBurn is a totally free and open-source DVD-burning program for copying homemade DVDs and is only available on Windows. It now only supports burning unprotected DVD content. If you want to burn the commercial DVDs you purchased for personal usage, you can try the easy-to-use and intuitive VideoByte DVD Copy.
If you still choose ImgBurn and think it can meet your requirements, you can read the following guide.
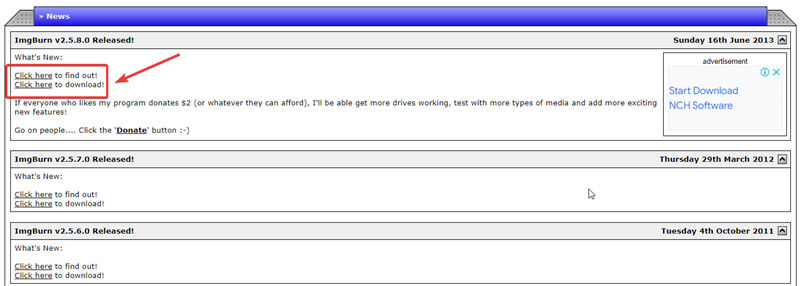
Step 1. Navigate to the official website of ImgBurn. Directly scroll down to the download section and choose the latest version to download. Be aware not to click some ads.
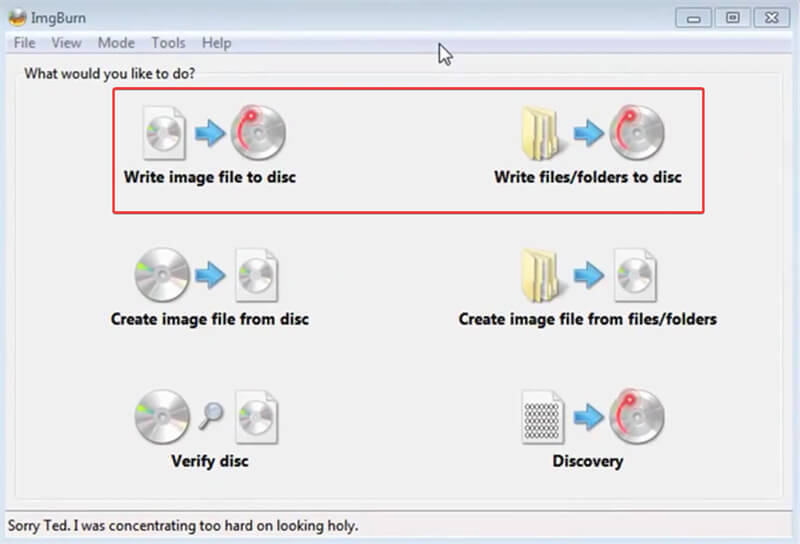
Step 2. On the main interface, choose to write image when you get ISO files. If you get a folder consisting of several Videos. TS files (normally ended with “.VOB”, “.IFO”, etc.), you should choose to write files/folders to disc.
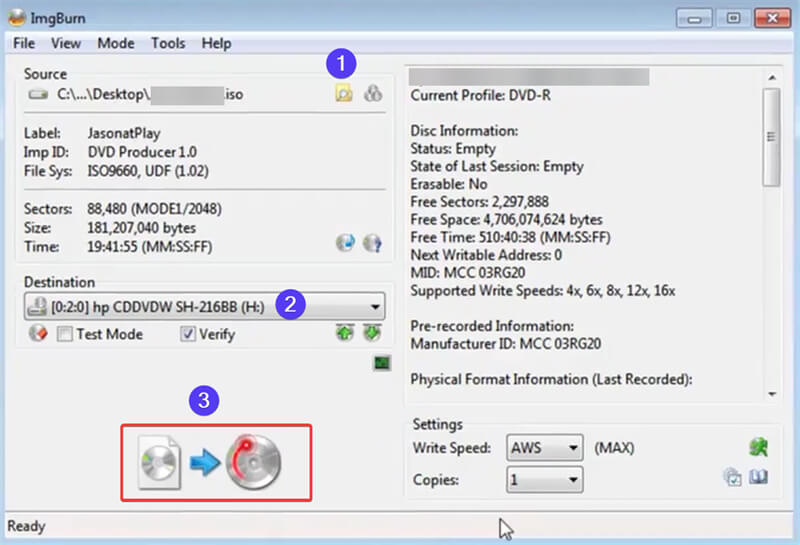
Step 3. Here is the final step! No matter whether you choose to write an image or folders to disc, you will get the same burning button on the bottom of ImgBurn in step 3. Before clicking on it, make sure you get the correct source by clicking on the “Browse” icon, as well as clicking to check the correct destination for burning to the correct disc.
Part 4. How to Copy a DVD to DVD on Windows 11/10/7 [Built-in Tool]
Generally, if your DVD is unprotected, you can follow the steps below to copy DVD to DVD for free on Windows 10/Windows 7 without the extra app.
Step 1. Insert the source DVD into the disc drive and copy the entire content from the disc to the computer.
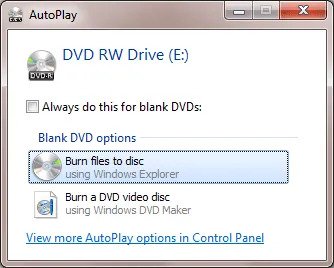
Step 2. Remove the source disc and insert a blank disc into the drive. When the computer reads the disc successfully, a window will pop up, and you need to select “Burn files to disc.”
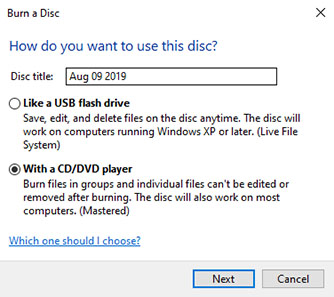
Step 3. Then, on the popup “Burn to disc” window, give a “Disc title” and then choose the “With a CD/DVD Player” option to burn the created DVD folder to DVD.
Step 4. Finally, drag and drop your DVD content on the computer to the DVD burning window that shows desktop.ini for burning blank DVD discs.
This free method can only be applied to the unprotected DVD movie disc. If you want to back up your protected DVD movies, you’d better select a reliable and powerful program like VideoByte DVD Copy.
Part 5. How to Copy DVD to DVD on Mac [Built-in Tool]
If you are a Mac user, you can follow the steps below to copy DVD to DVD on your Mac computer:
Using Disk Utility to make a DVD image file
Step 1. Plug the source DVD into your Mac computer and open Disk Utility, which you can find in the Applications > Utilities folder.
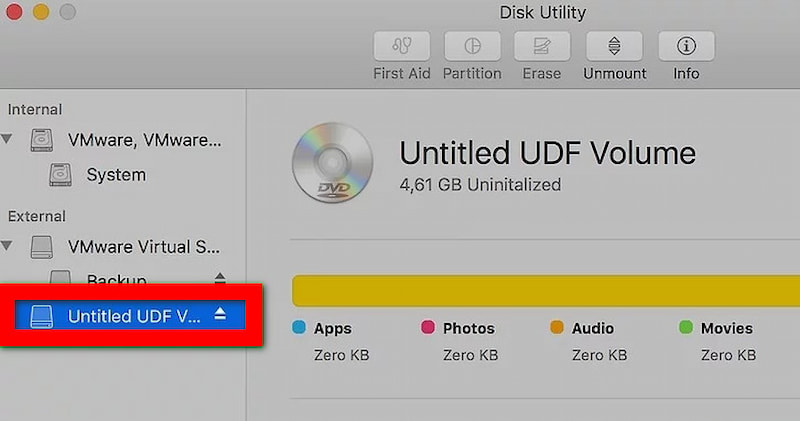
Step 2. In the left panel, locate and select your DVD drive (the name of the DVD is usually displayed).
Step 3. Go to File > New Image > Image from [your DVD's name].

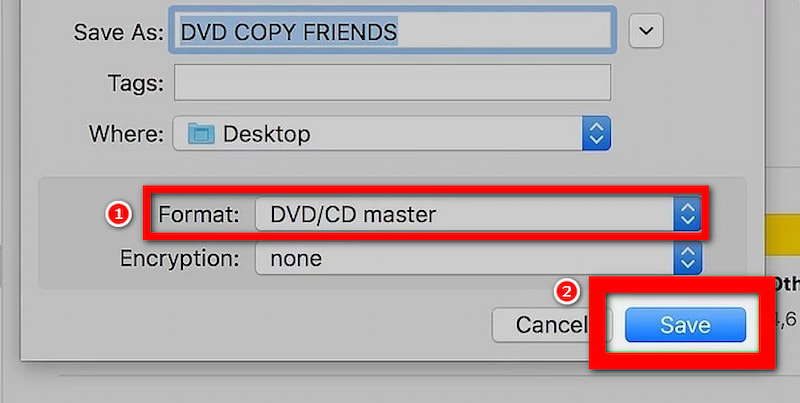
Step 4. Choose the Format as “DVD/CD master”, and click the Save button.
Now, Disk Utility will start creating the DVD's image file. Depending on the size of your source DVD, this may take some time.
Now, Disk Utility will start creating the DVD's image file. Depending on the size of your source DVD, this may take some time.
Step 1. After creation, eject the source DVD and insert another blank DVD into your PC drive.
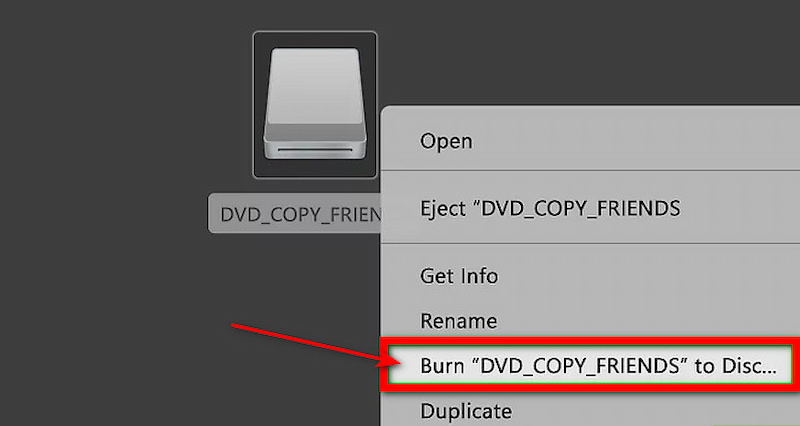
Step 2. Find the created DVD image file (usually a .cdr file). Right-click on it and choose “Burn to Disc…”.
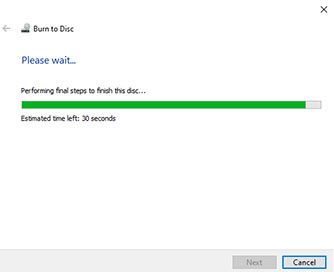
Step 3. Click Burn once you have confirmed the information. The burn process will take some time, and after the progress is complete, the DVD will be ejected automatically. Then you get a copied DVD Successfully.
Part 6. Best Practices for High-Quality DVD to DVD Copies
In order to help you get high-quality DVD copies, we’ll share some useful tips with you here:
1. Choose a blank DVD with highly recognized brands and reliable quality. DVDs with low quality may cause errors in the copying process and affect the final playback. A high-quality DVD usually has better stability and larger durability for data storage.
2. Ensure the source DVD is clean and undamaged. A cleaner DVD can effectively reduce read errors.
3. Use professional DVD copy software. Rationalize the parameters to balance the copy speed and quality, etc.
4. Choose appropriate audio and video formats. For DVDs containing multiple audio tracks or subtitles, make sure that you select the appropriate format to avoid compression or removal of content.
Part 7. FAQs on Copying DVD to DVD
How to Copy DVD to DVD with HandBrake?
1. Insert the DVD you want to rip into your PC and open the Handbrake. It will take some time to scan your DVD.
2. After scanning, choose an output format to rip the DVD.
3. Choose the destination to save the DVD copy.
4. Start to rip the DVD.
How to Copy Movies from DVD?
How to Copy Movies from DVD?
1. Connect your DVD to a computer via a DVD drive.
2. Use VideoByte DVD Copy to create an image file of the DVD movie. The detailed steps have been provided above.
3. Save the image file to your computer, and you will get a copy of the movie from DVD successfully.
Can I Copy and Burn DVD with Windows Media Player?
Yes, if you are using a Windows system, Windows Media Player can help you copy and burn DVDs. However, note that the built-in tool is not always reliable, especially when you update the computer system. Instead, you can try VideoByte DVD Copy, a free DVD to DVD copy software.
Can I Use Windows DVD Maker on Windows 10?
No, DVD Maker was no longer supported by Microsoft on January 10, 2017. If you are looking for a useful DVD Maker, try VideoByte DVD Copy.
Conclusion
Copying & burning homemade DVD to DVD is easier, and free options, including Auto Play & ImgBurn, mentioned in this passage, can do. However, as many DVDs purchased from the market are armed with protections, a DVD copy tool that can remove DVD protection is a more favorable choice. VideoByte DVD Copy is the one that is worth trying. You can now download it for free and try it!