Burn Videos to DVDs and Blu-ray Discs Effortlessly
In 21 century, the DVD market occupation and usage are truly falling. Despite the declining trend, there’s still a large number of people who is a big fan of DVDs, hoping to continue enjoying the content on DVD on a Mac. But Mac doesn’t support iDVD anymore, and many of them feel lost on how to play it. Therefore, that’s why we’re here. This guide will show you 6 proven ways to burn a DVD on a Mac. As we know, by the way, almost 80% to 90% DVDs or Blu-rays are encrypted by DRM, and we will also offer the corresponding solutions to remove it. Anyway, let’s drive into the post!
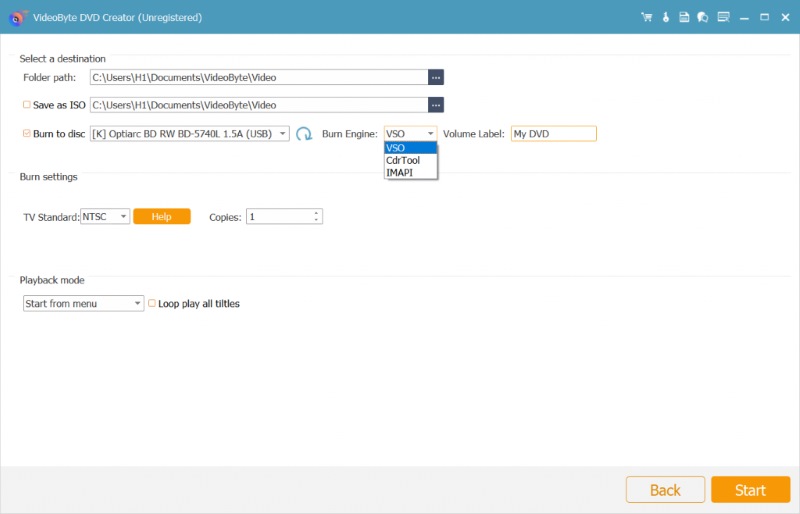
What’s coming first is VideoByte DVD Creator, which is highly recommended by both professionals and beginners. What makes it stand out is that you can one-stop burn DVDs in a clean interface without professional knowledge. The software supports import popular video formats, including MP4, MOV, AVI, WMV, etc., to DVDs and Blu-ray discs/Folder/ISO files. Most surprising, it has a built-in video editor, allowing you to customize your video by adding text, audio, and more effects. Also, as a DVD menu creator, the app offers various menu templates and styles for easy DVD content navigation. You can collect all of your treasured movies, recorded videos, or videos downloaded online and burn them onto a DVD effortlessly!
• Supports 300+ mainstream video formats.
• Offers flexible output options.
• Supports common disc types (DVD-5/DVD-9, BD-25/BD-50, BD-R/BD-RE).
• Personalize video with built-in DVD menu and editing tool.
• Blazing-fast burning speed.
• Preview effects before finishing conversion.
How to burn DVDs on Mac via Videobyte DVD creator?
Step 1. Click DVD Disc > Add Files to select your video on the main interface.

Step 2. If needed, click Edit to adjust your video, such as adding watermarks/music/subtitles, or trimming. Cropping, etc.

Step 3. Create a DVD menu by choosing default theme templates, or customizing it as you like and click Save to go on.

Step 4. Insert a blank DVD and tab the Burn > Start to create a DVD on Mac.
Knowing how to burn YouTube videos to DVD, go for the post: 4 Easy Ways to Download and Burn YouTube Videos to DVD.
Finder, one of the best DVD burning software, is a very straightforward tool to burn a DVD on a Mac: It treats the disc like a removable drive, so you can simply drag your files, be sure of the contents, and eject when you’re finished. This process is performed using the macOS built-in tools and can be achieved using a USB or internal optical drive, and no additional software is needed. Use Finder when you want to quickly and manually burn documents, photos, videos, backups, etc. Finder is useful here, primarily for single-session discs and basic data discs. Finder is not ideal for advanced video authoring, nor for multi-session projects. Below are clear and simple step-by-step instructions on preparing, burning, and finalizing your DVD with Finder, on either your MacBook or iMac, today.
Step 1. Insert your DVD into your Mac’s optical drive or an external USB DVD drive.
Step 2. Click the Finder icon in the Dock to open a Finder window and locate your DVD.
Step 3. Drag and drop the files or folders you want to burn into your Mac in Finder.
Step 4. Once done, look for Burn on the top right corner and click it.
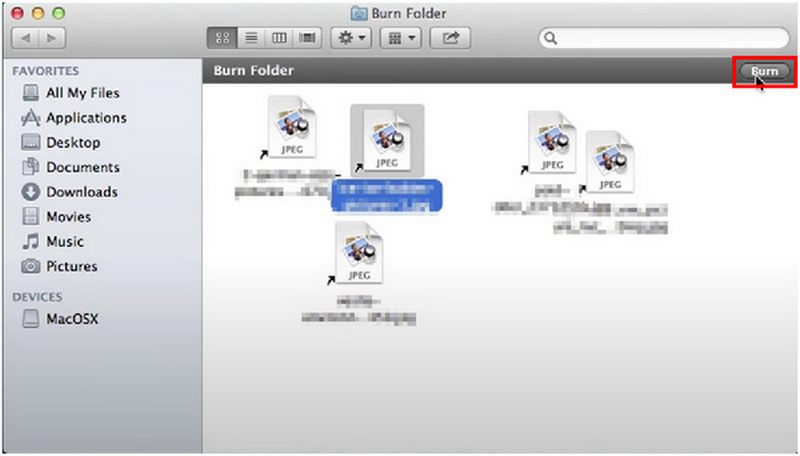
Step 5. After the burning process, eject the DVD, then reinsert it or test on another computer to ensure files open correctly.
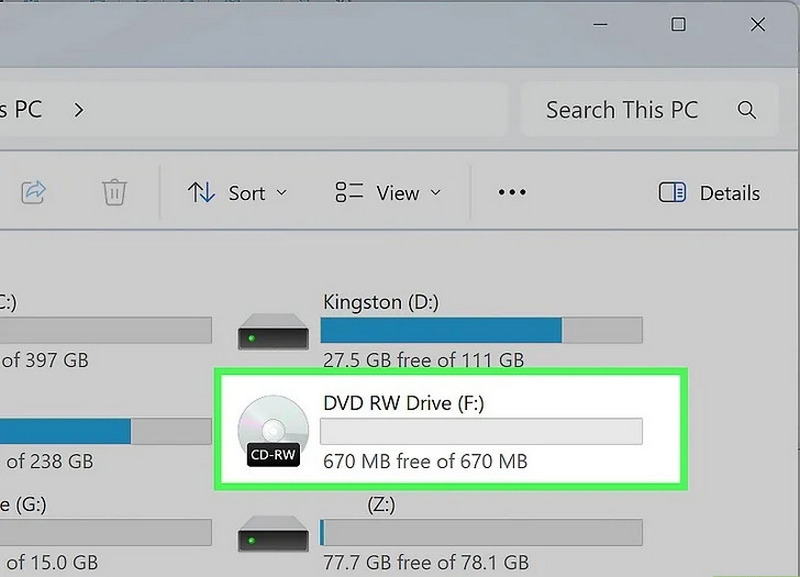
iTunes offers the ability to burn audio CDs and data DVDs from your playlists or folders, which is a good option when you want an audio compilation that is ready to play or a data disc that builds from your media library. iTunes is a straightforward process to collect tracks, export the playlist as a burn folder, and simply write to disc.
This is best suited for a standard audio CD or generic data disc, but not for authored video DVDs. Before burning a disc on a Mac, be sure to check the file formats and media capacity to ensure it can accommodate your media. Therefore, if you need to burn a protected DVD, you have to choose a tool that
Step 1. Put a blank writable DVD into your Mac's drive or external burner, then launch iTunes from Applications.
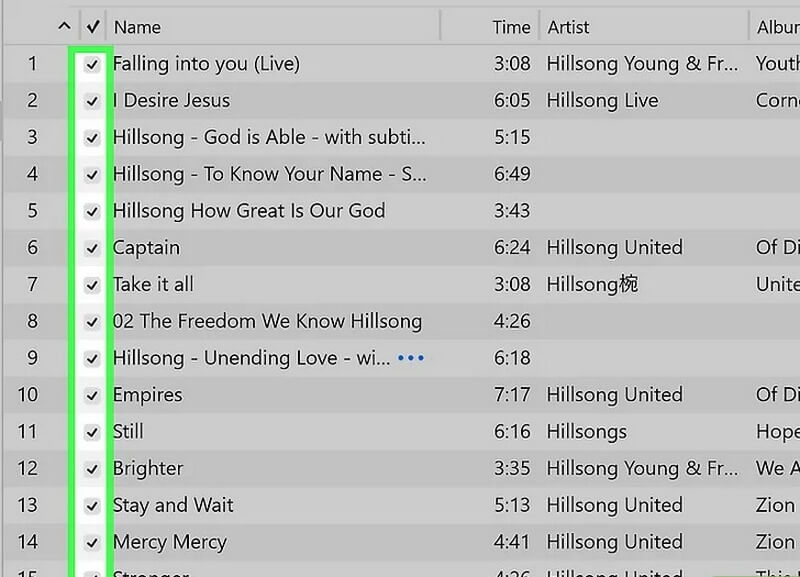
Step 2. Click the plus icon, choose New Playlist, name it, and drag the songs or media you want to burn into that playlist.
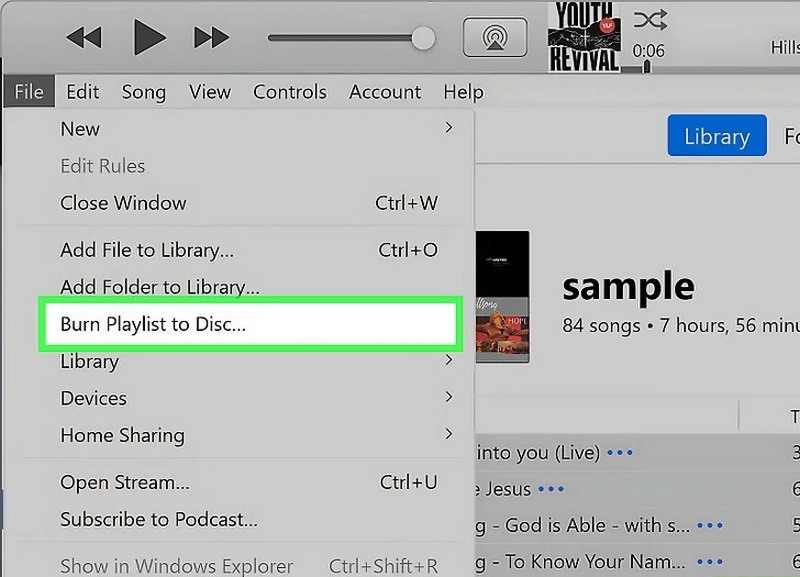
Step 3. With the playlist selected, choose File > Burn Playlist to Disc
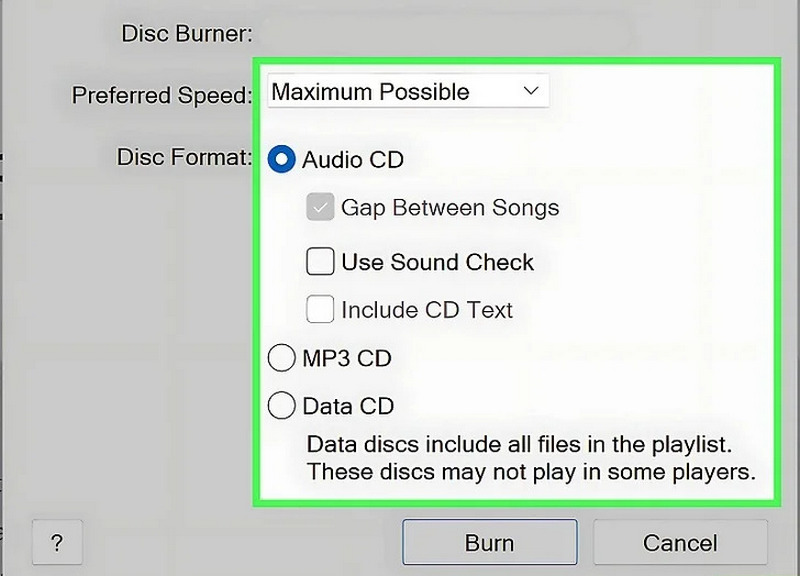
Step 4. Pick the disc format and burn speed, then click Burn.
Step 5. Wait for iTunes to finish and verify the burn, then eject the disc and test it on another device.
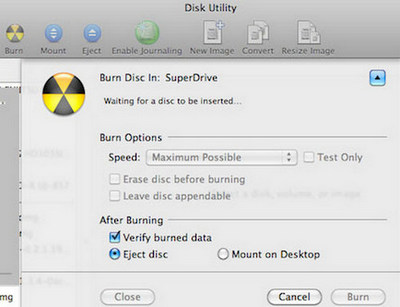
With Disk Utility, you can create and burn disc images ( ISO or DMG ) for a reliable backup and copies of folders or volumes. Create an image, verify the integrity, and then burn the image to a blank DVD. Disk images are the most efficient way to reclaim a computer system, save archived projects, or share your file structure without dragging files manually.
Step 1. Open Disk Utility and insert your DVD.
Step 2. Look for File > Burn Disk Image (Name) to Disc…
Step 3. Click Burn to begin.
LiquidCD is a free, lightweight burning app for macOS that supports making video DVDs, audio CDs, and data discs. It can create or burn ISO/CUE images and is useful when you need a no-frills tool for cross-platform discs or older macOS versions where built-in apps are limited.
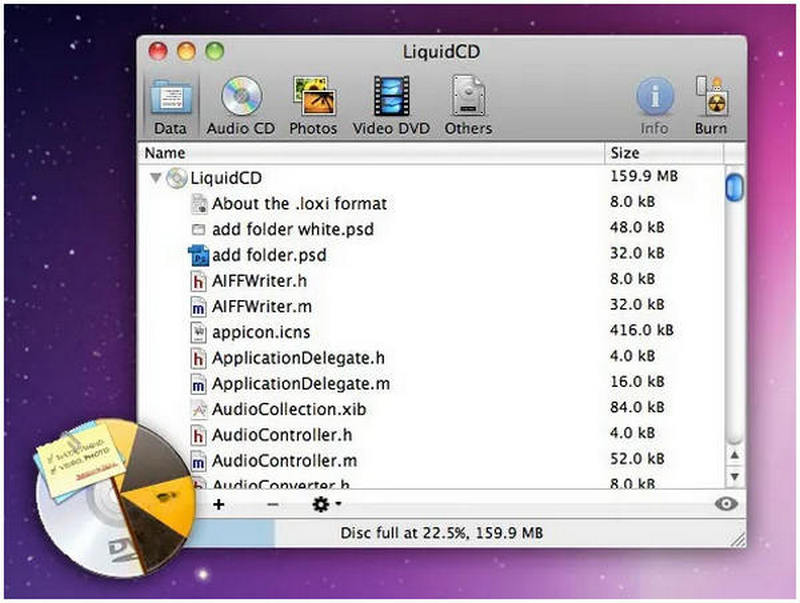
Step 1. Download LiquidCD from a trusted archive and open the downloaded package to install it.
Step 2. Put a writable DVD into your Mac’s internal drive or an external USB DVD burner.
Step 3. In LiquidCD, select the project: Video DVD, Audio CD, or Data Disc / Image, depending on your files.
Step 4. Drag your video files, audio tracks, or an ISO/CUE image into the LiquidCD project window and arrange them as needed.
Step 5. Click Burn; select an appropriate burn speed; start the process, and wait for LiquidCD to finish and verify the disc before ejecting.
Terminal is another way to burn a DVD on a Mac. It gives exact control for building and burning a disc image, batch automation, or codifying a trusted workflow in your scripts. You can build an ISO or DMG from files or a folder, check checksums, and send the image directly to the optical drive, all with built-in command line utilities. This process is powerful for advanced users, system administrators, and automated backups where GUI tools are too slow or inflexible.
Step 1. Insert a blank DVD that has enough space.
Step 2. Bring up the terminal and enter the command: hdiutil burn ~/Path/To/DiskImageFile.iso.

Besides the methods above, you can also burn a DVD with VLC.
Today, we have examined 6 effective ways to burn a DVD on a Mac. For those who don’t want to download any third-party tools, you can take Finder, iTunes, Disk Utility, etc. They, nevertheless, need some knowledge to use, which is not so friendly to beginners. Thus, if you are seeking a one-stop tool, you can get your eyes on VideoByte DVD Creator. It finishes burning with personalized settings and fast speed, letting you DIY all kinds of videos to DVD at your preference.
Hot Articles
by in 7 February, 2025
by in 30 July, 2025
by in 26 March, 2024