Do you enjoy the leisure time watching hit episodes or funny movies on TV or on the desktop? I bet you do. Some people may collect a bunch of DVDs of their favorite TV shows, Music Videos, and Movies. However, don’t you think it’s a bit troublesome to insert in and out the DVDs every time, which can also wear out your DVD collection.
So, why not rip DVD to HD video formats with high quality, for example, H.265? H.265 is also known as High Efficiency Video Coding (HEVC), which is a video compression standard offering from 25% to 50% better data compression at the same level of video quality. That’s to say, H.265 videos can be in a much smaller file size with the same quality compared to other video formats like 3GP. MKV, AVI, etc.
Better yet, your DVD data will be transcoded and stored on your Windows or Mac for anytime viewing and forever preservation. You can then easily review your favorite TV episodes and movies on Apple TV or desktop. Have no idea how to convert DVD to H.265? This guide will lead you to success.
Best Way to Convert DVD to H265 at High Quality
Are the DVDs you want to convert encrypted or commercial? Then, they must be well protected by Digital Rights Management and you should find a way to bypass it using a professional ripper.
VideoByte BD-DVD Ripper enjoys a great reputation in the field of decrypting and transcoding both homemade and protected DVDs / Blu-ray Discs. Its leading decoding technology makes it easy to keep the hight quality output to MP4 in H.265 codec.
If you didn’t use Video BD-DVD Ripper ever, you may want to learn its highlighted features, pros and cons here.
Highlighted Features
Highlighted Features
- Able to decrypt DRM including AACS, Cinavia, APS, CSS.
- Easy to rip homemade and commercial DVDs / Blu-ray Discs.
- Support 300+ mainstream video and audio formats.
- Offer quality lossless video and audio output.
- Provide 6x faster encoding speed to H.265 at high quality.
Pros
- Intuitive operation and user-friendly interface
- Professional encoding and decryption technology
- Fast conversion rate with GPU hardware acceleration
Cons
- Paid to use. (Free trial provided)
Being professional doesn’t make VideoByte BD-DVD Ripper a hassle to use. In contrast, it’s easy to follow and operate. Taking Convert DVD to H.265 as an example, it’ll be done in just 3 steps.
STEP 1. Set up the Software
Click on the Download button below and it’ll auto download Video BD-DVD Ripper based on your computer system. You should want to complete the setup once the package is downloaded. After that, launch it on your desktop.
System Hardware Requirements
- Windows:Windows 10/8/7/Vista/XP (SP2 or later
- Mac:Mac OS X 10.7 or above
- CPU:1GHz Intel/AMD CPU or above
- RAM: 1G RAM or more
STEP 2. Load Your DVD
Now, load your DVD with the program clicking Load DVD – Load DVD Disc. The full process will be done in no time.
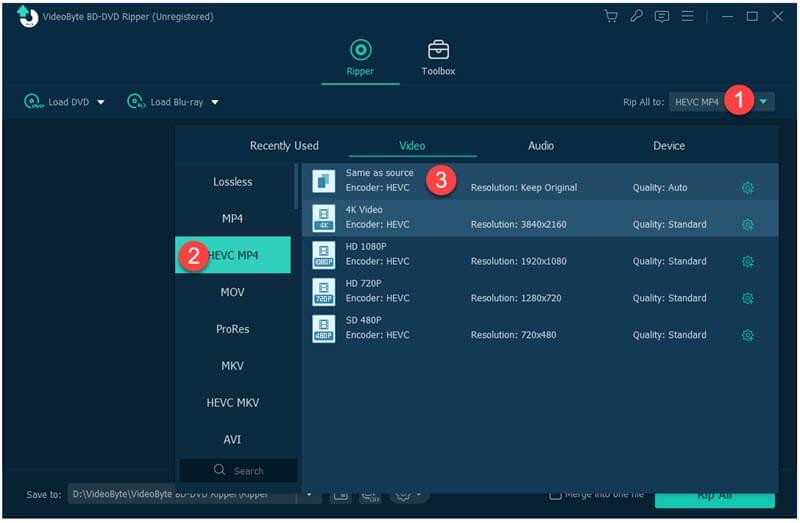
For more custom preset, you can click the Settings icon on the left and a window will pop up. Select to High Quality for video quality. You can also modify frame rate, bitrate, or resolution as desired. However, if you’re new here, it’s better to leave it unchanged. Click Create Now and a new profile will be set up.
STEP 3. Convert DVD to H.265
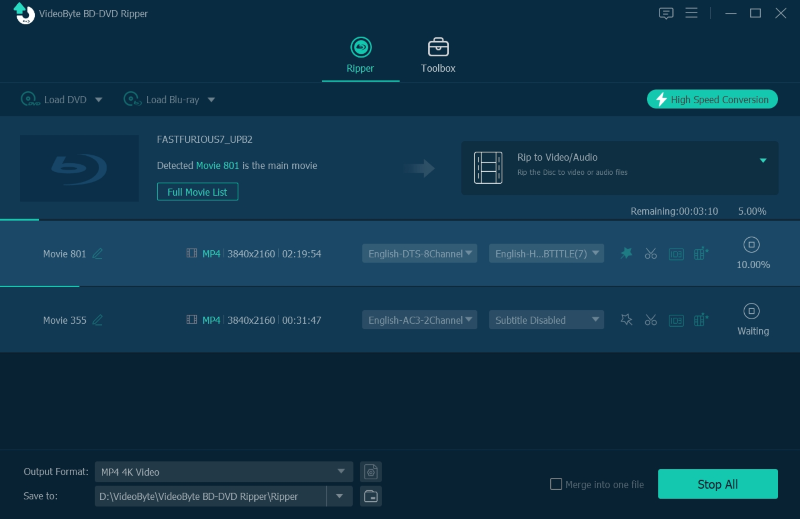
Choose the profile you just created and select the output path. After that, click Rip All and go to have a cup of coffee. Thanks to the fast acceleration, it may take minutes to digitize your DVD to H.265.
Free Convert DVD to H265 [Best Optimal Settings Provided]
If you want to convert homemade DVDs to H.265 with HD quality, there are many free rippers of 2026. HandBrake will be the best free choice for you. This is an open-source developed by Eric Petit to make ripping DVDs to a data storage device easier.
This transcoder can help convert videos from almost any format to MP4, MKV, and WebM on multiple platforms like Windows, Mac and Linux. What’s more, HandBrake enables users to modify output parameters. However, the operation could be a bit complicated. You may want to have an overall introduction to the program.
Pros
- Free to use
- Provide built-in device presets
- Live static video preview
Cons
- Complicated to use
- Less output formats suppotred
- Less operating system supported
- Long encoding process
- No tech support
How to free convert DVD to H.265 using HandBrake? HandBrake allows users to custom output preset with best optimal settings. It could take more steps. I’ll try to break them down clearly.
STEP 1. Install HandBrake. It only supports a few operating systems, so you want to make sure HandBrake works on your Mac/ Windows before going any further.
- Widows: Windows 10 and later
- Mac: macOS 10.13 and later
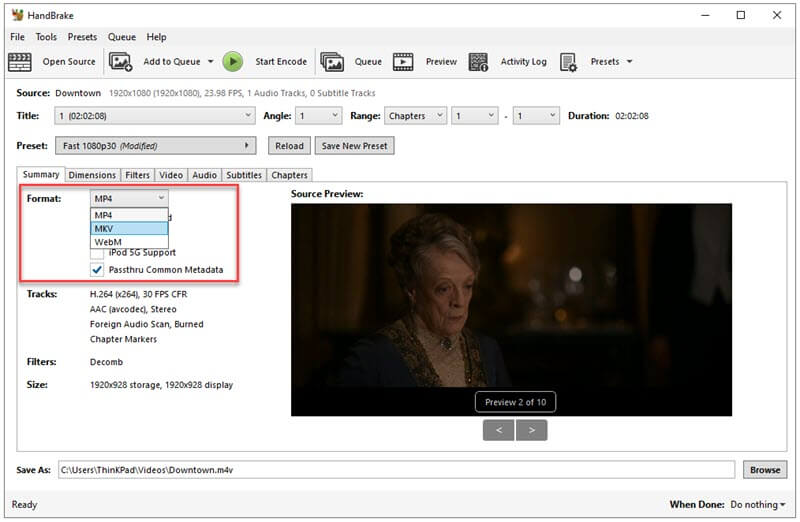
STEP 2. Select your DVD as source and you’ll be on Summary tab.
STEP 3. Drop down Format bar to pick a desired output format. (MP4, MKV, WebM)
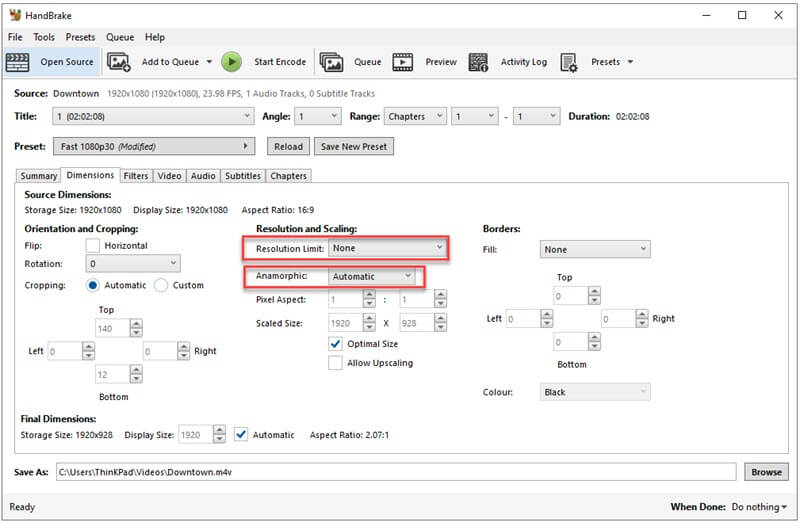
STEP 4. Switch to Dimension tab, ensuring Resolution Limit set to None and Anamorphic to Automatic. No need to change other parameters unless you have to do so.
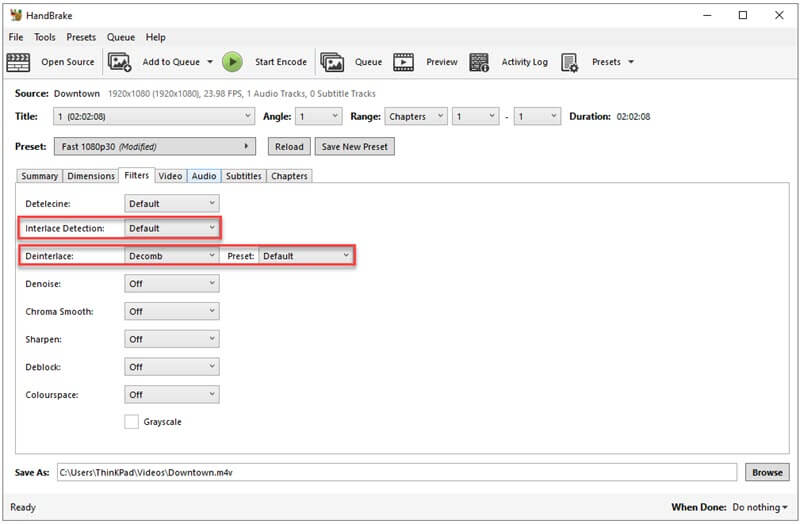
STEP 5. Now to Filter tab. Set Interlace Detection to Default and Deinterlace to Decomb while the preset is set to Default as well. This makes the video progressive for a better viewing experience.
STEP 6. Next, go to Video tab and set the video encoder to be H.265(x265) codec. You can also modify the frame rate, however, it’s suggested to keep it same as source. In this part, you should also select Constant Framerate rather than Variable/Peak Framerate. The latter ones are not widely supported by media players.
As for other parameters like Quality and Encoder Options, I recommend you to stay in default settings if you’re unfamiliar with program.
Now, let me show you a magic spell. In Advanced Options, copy and paste the following in the blank: [span-intra-smoothing=0:rect=0:aq-mode=1]. This allows even greater tuning of the codecs performance. It’s okay to skip it if you don’t want to try this.

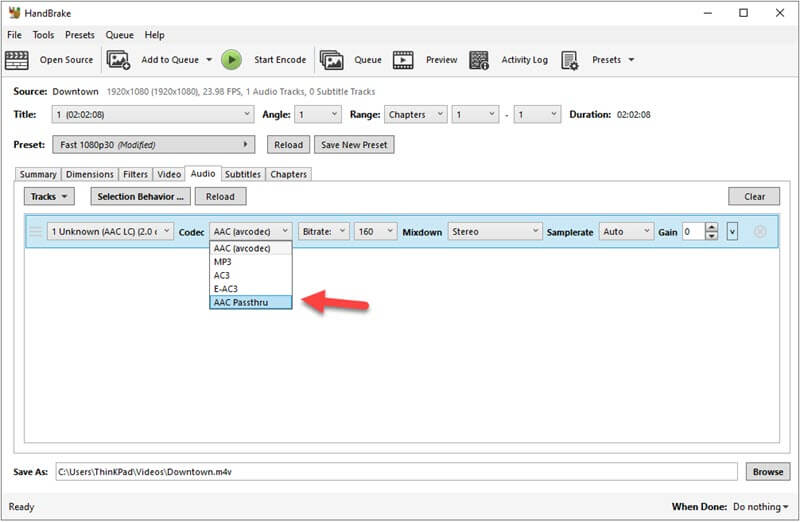
STEP 7. Go to the Audio tab. You can modify the audio tracks here or add extra audio tracks. If you want to keep the original Dolby Digital sound without being modified, you can set the Codec to AC3 Passthru.
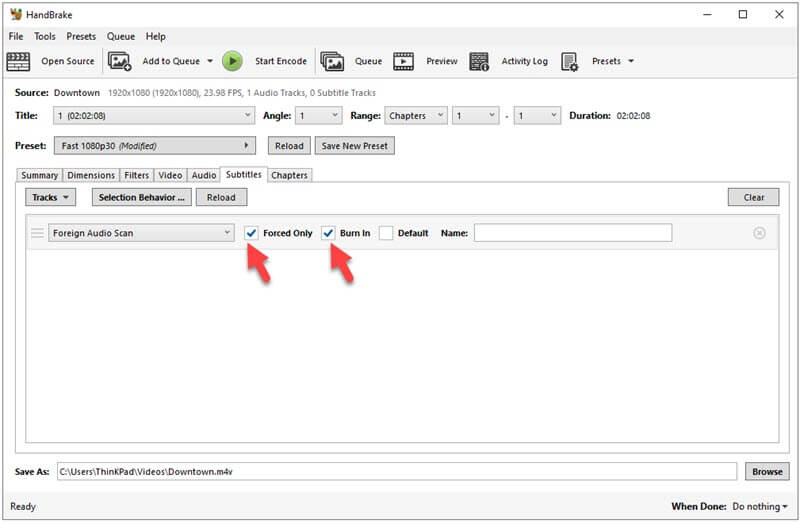
STEP 8. Now, we’re in the Subtitles tab. If your DVD is captionless, skip this part. To delete the subtitle, just simply click the X on the right. To keep the subtitles, there are two options for you to consider whether to check or uncheck.
- Forced Only: It keeps the subtitles for the whole video.
- Burn In: It enables whether the subtitle can be manually turned on/off.
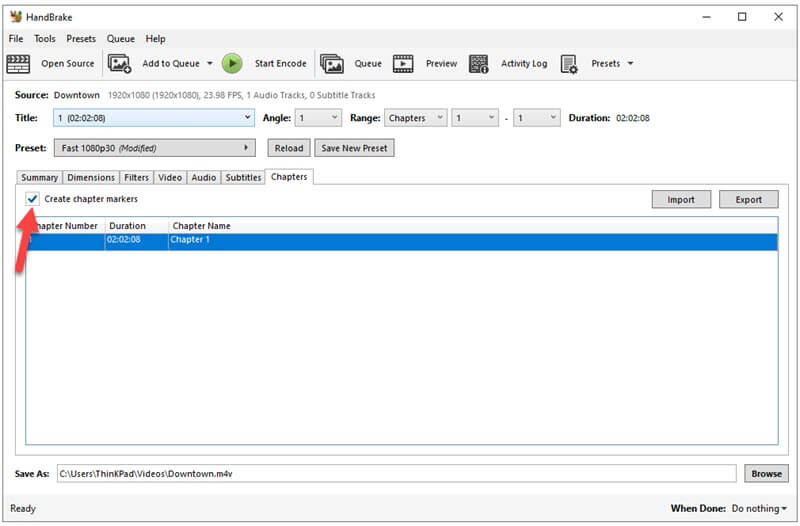
STEP 9. The final tab is Chapters. HandBrake will auto recognize the chapter markers. It’s okay to leave the Create chapter markers checked or unchecked. If you like to watch it on TV, better to keep the option checked. If you prefer to view on the computer, it doesn’t really matter.
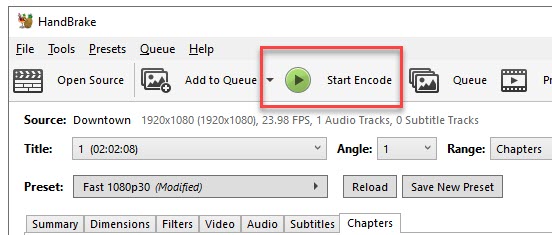
STEP 10. After all the preset, you can hit the Start Encode button in the middle to convert your DVD to H.265 with high quality, but HandBrake is famous for being slow in encoding rate. You may find some entertainment while waiting for it to finish.
Now, we’re done introducing the professional way and the free way to convert DVD to H.265. Please follow the guide step by step and you’ll definitely meet your needs. Hope this post can help you out. If you got any trouble with VideoByte or HandBrake, leave a message below and I’ll get back to you soon.


