As wedding day is one of the best and most unforgettable day in your life, you may want to watch wedding videos again and again to review your wedding day, share wedding videos with your friends as well as tell your children about your love stories and how happy you are on wedding day. To do these, you need to preserve your wedding videos well. One of the best ways to preserve is to convert wedding videos to DVD. Then how to make a wedding video DVD? You can use VideoByte DVD Creator to make a wedding video DVD with high quality.
VideoByte DVD Creator Brief Introduction
Your wedding videos are recorded by different devices including high-definition camera and DV, so you may worry about if your wedding videos can be converted and burned by VideoByte DVD Creator or not, as a few video converters can only support few video formats. Actually, VideoByte DVD Creator is the functional software which can create DVD disc, DVD folder or ISO file from videos in almost all popular formats including MOV, AVI, MTS, etc. What’s more, you can add some visual effects to wedding videos, such as editing wedding videos, adding titles and customizing DVD menu.
Now you may be too impatient to wait to have a try, just click the download button below to download and install VideoByte DVD Creator.
What You Need
Before making a wedding video DVD, you are supposed to prepare things below:
a. Software: VideoByte DVD Creator
b. USB cable/ Fire-wire /HDMI
c. Computer
How to Make a Wedding Video DVD
Step 1. Register to VideoByte DVD Creator
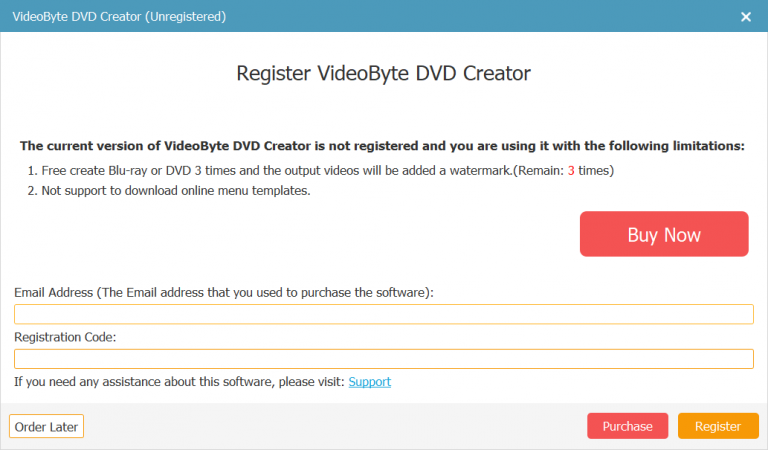
Download, install and open VideoByte DVD Creator. With a free trial version, you can’t use this software to burn videos to DVD more than 3 times or download online menu templates. To create a wedding video DVD with better visual effect, it would be better to register VideoByte DVD Creator before using it.
Step 2. Export Wedding Videos to Computer and Import Wedding Videos
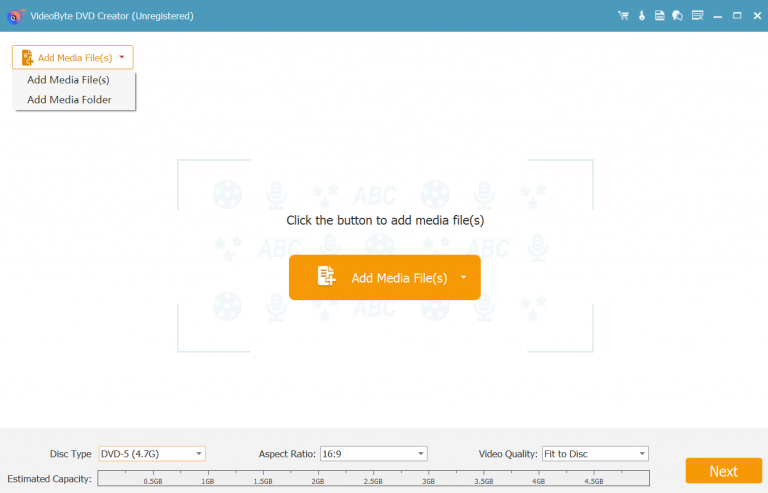
Use USB cable/ Fire-wire /HDMI to export wedding videos from a camera or DV to your computer, and then click one of the “Add Media Files” icon at the middle interface upper-left corner to import wedding videos to the program.
Step 3. Edit Wedding Videos
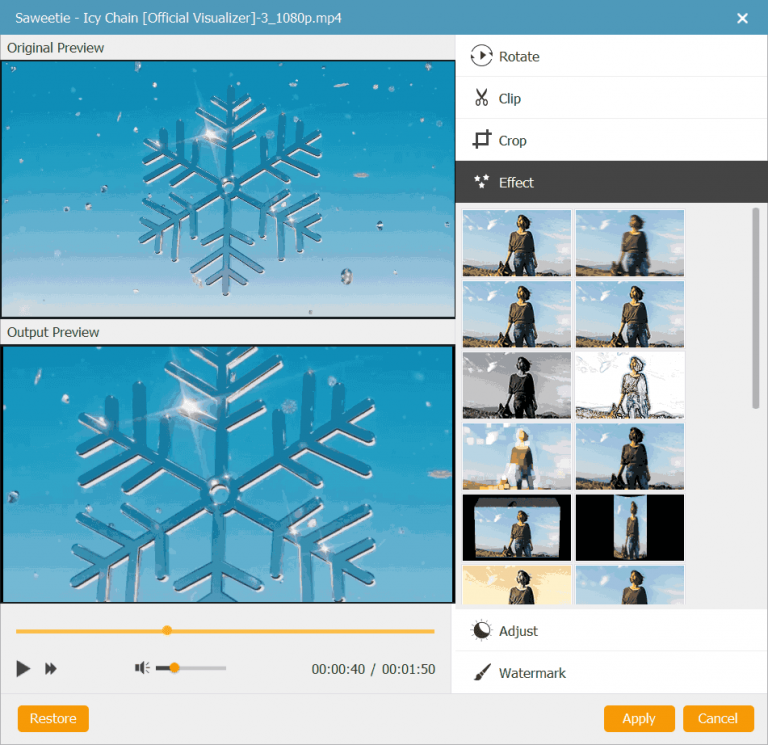
You are free to add some special effects to videos, find a “Magic Stick” icon at the right side of each video, then click on it to edit the video including rotating, cropping, trimming, adjusting the brightness, adding filter and watermark. If you aren’t satisfied with the edited video, you can click “Restore” icon on the bottom to reedit. After finishing editing, click “Apply” icon on the bottom.
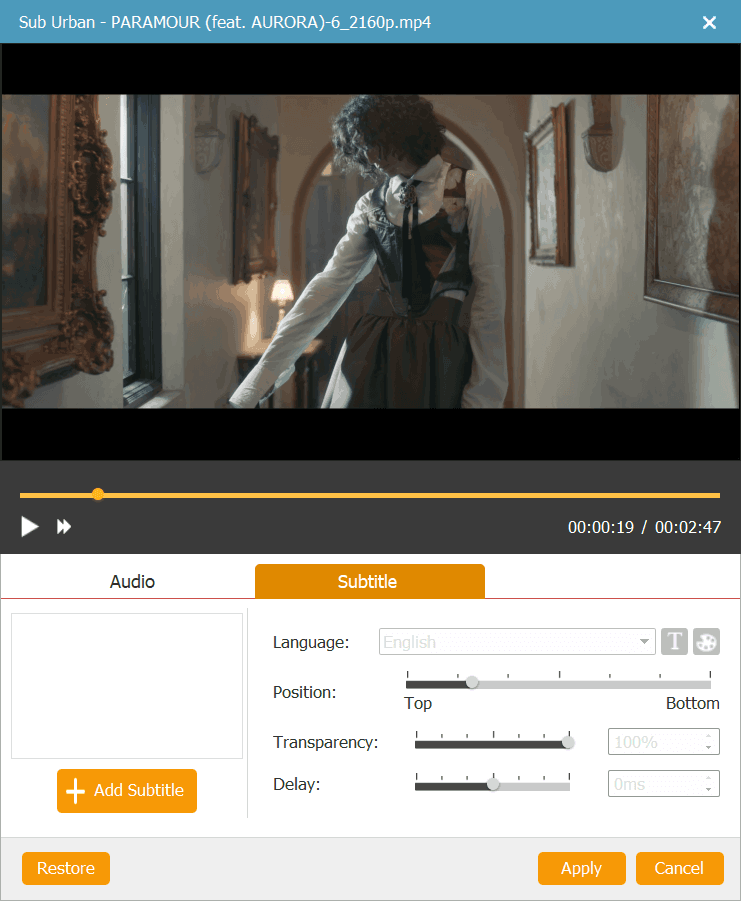
Besides, you can change basic parameters of DVD disc such as Disc type, aspect ratio and video quality by selecting the parameters in the bottom of main interface and click “subtitles” option next to “Magic Stick” to add and enter subtitle.
Step 4. Customize DVD Menu for Wedding Videos
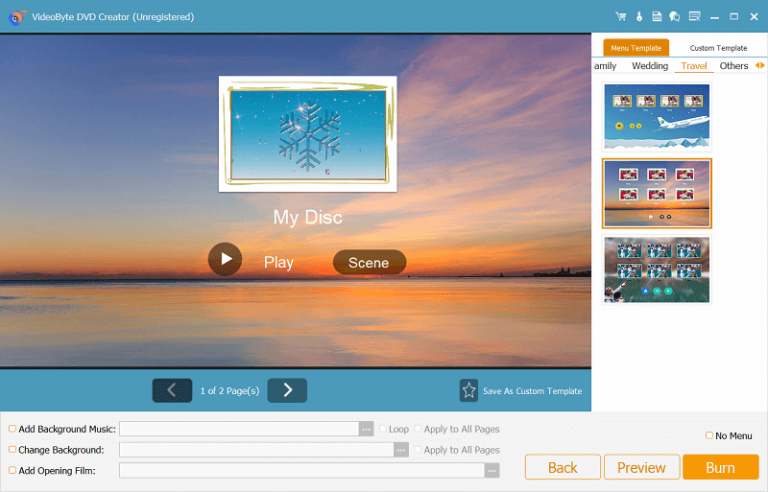
Press “Next” icon at the bottom right corner to edit wedding video DVD menu. At the left side, you can see menu template in various style such as holiday, wedding, family, travel and so on, just select wedding menu or others you like. You can also change the title subject and add background music & opening film to your videos at the bottom.
Step 5. Start Burning Wedding Videos to DVD
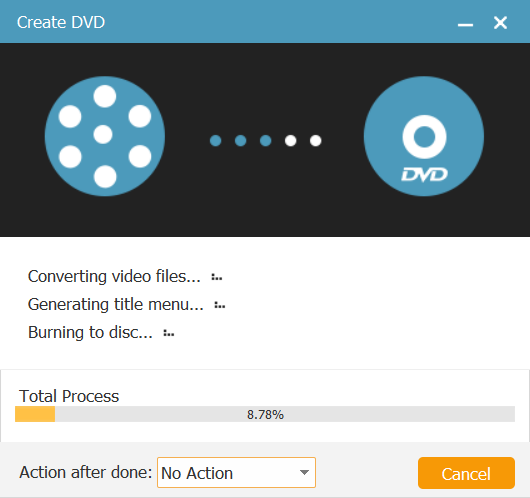
Insert a blank DVD disc into DVD-ROM before start burning, then click on “Next” icon at the bottom right corner. You can save output folder in DVD or DVD ISO file. In addition, you can set TV standard and playback mode as you like. When all of these are settled, you can click “Start” in the lower right corner to burn wedding videos to DVD.
Done! I guess now you can’t wait to share your wedding video DVD to your family and friends, but please don’t forget to tell them you make it by VideoByte DVD Creator which is functional and useful. VideoByte DVD Creator can not only make a wedding video DVD, but also convert and burn iMovie videos to DVD. Just click the download button right now and create your special DVD.


