


The user who has the experience of digitizing the physical DVD or Blu-ray disc knows that the file size of the converted DVD/Blu-ray movie always very large. When you need to convert many of DVD/Blu-ray movies, it will take up a lot of computer space. It’s also inconvenient for you to transfer these converted files to other portable devices for enjoying. So, is there a way to rip DVD and Blu-ray to video file with the file size you need? You can get the answer in the post today.
What Causes the Large File Size of the Ripped DVD/Blu-ray File
Before we get started, one thing we need to make clear: what makes a DVD/Blu-ray file larger or smaller? Actually, there are many factors which can affect video file size while five variables that count for a lot in deciding the video file size. They are resolution, frame rate, time length, format and encoding. DVD/Blu-ray file size can be adjusted by changing these parameters. And you need to know that the video quality will be affected by changing them.
For the concept of reducing video file size has many technical variables associated with it, so we directly list the takeaway you can reduce the video file size:
- Large resolution will increase file size, so choose a proper resolution for your video. Exporting at 720p will be a good plan to balance quality and file size.
- The higher frame rate will cause larger video file size.
- The longer the time length, the bigger the file size.
- Format also affects video file size. We recommend you to choose MP4 of H.264 which preserve the best quality but smallest file size. For video formats, AVI formats will generate 10 times file size than WMV and 15 times than MP4 (the same video file). What’s more, MP4 is the most compatible format.
Now that we know the gist of deciding the video file size, move on to get a helpful tool which makes work easier.
The Way to Ripping DVD/Blu-ray Movie to Proper File Size
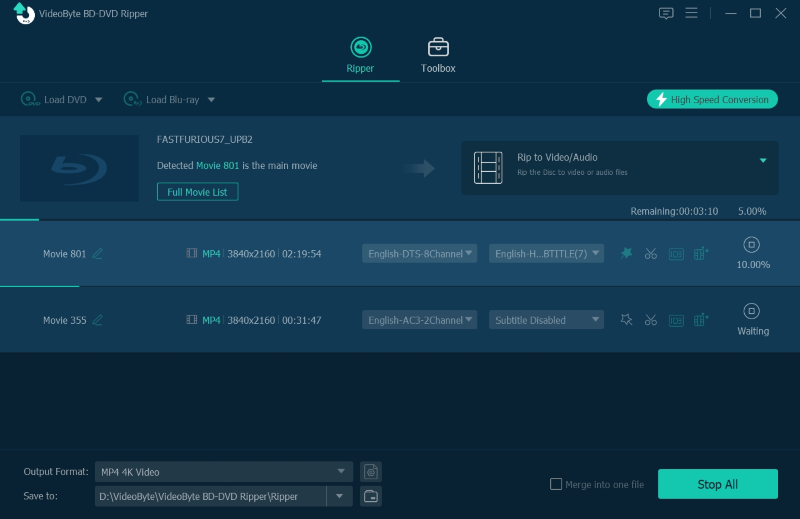
VideoByte BD-DVD Ripper is a desktop program which is born for ripping DVD and Blu-ray disc into digital videos. It’s well-trusted because of its excellent performance in converting Blu-ray/DVD discs into a wide range video/audio formats including MP4, MKV, MOV, MP3, AAC and so on. What’s more, this program allows users to select the resolution, movie clip, frame rate, encoding, format, audio track and subtitle at will so that you can rip the Blu-ray/DVD movie to the proper size you want.
Notice:
VideoByte BD-DVD Ripper has Windows version and Mac version. They have different interfaces but the same functions. In the following article, I’ll take the Windows version as example.
Step 1. Import DVD Disc (Also Applied to Blu-ray Movie Disc)
Before ripping the DVD or Blu-ray disc, you need to prepare:
- Ensure the smoothness of your network
- Download and Install VideoByte BD-DVD Ripper
- Connect external drive to computer and insert the disc
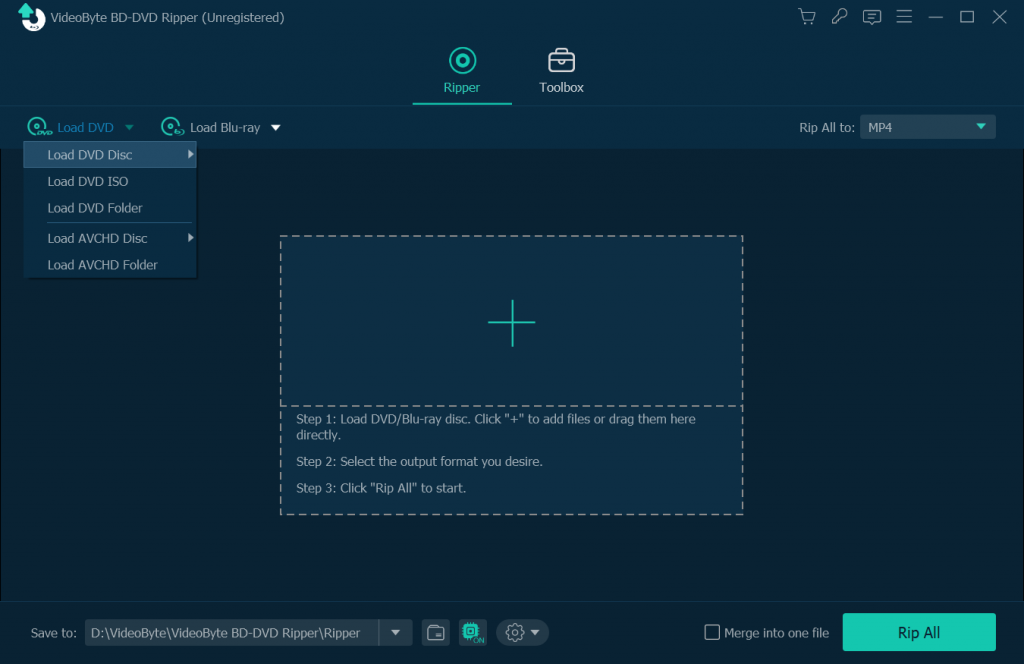
Then, double-click to open VideoByte BD-DVD Ripper. Click “Load DVD” > “Load DVD Disc” on top left.
Step 2. Choose DVD Movie Playlist
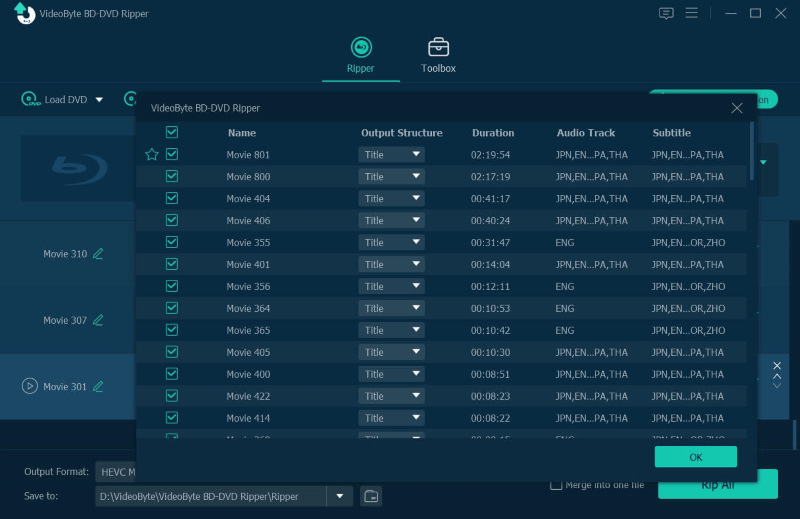
It will pop up a successfully-analyzed window and tell you which part is the main movie. Click “Full Movie List” and you can go through all the video clips. Then, move your cursor on the movie clip and it will appear a playback button which allows users to preview before selecting. We recommend you to choose main movie only so that it doesn’t take too much space in your computer.
Step 3. Select Output Format and Video Quality
After choosing the movie clip, it’s time to choose output format. To balance video quality, file size and device compatibility, we recommend you to choose MP4 of H.264.
Click the drop-down list of “Rip All to” and enter “MP4” in the search box at bottom left. Then, choose the resolution you need. Click the “gear-icon” in the quality column you chose just now and go to next step.

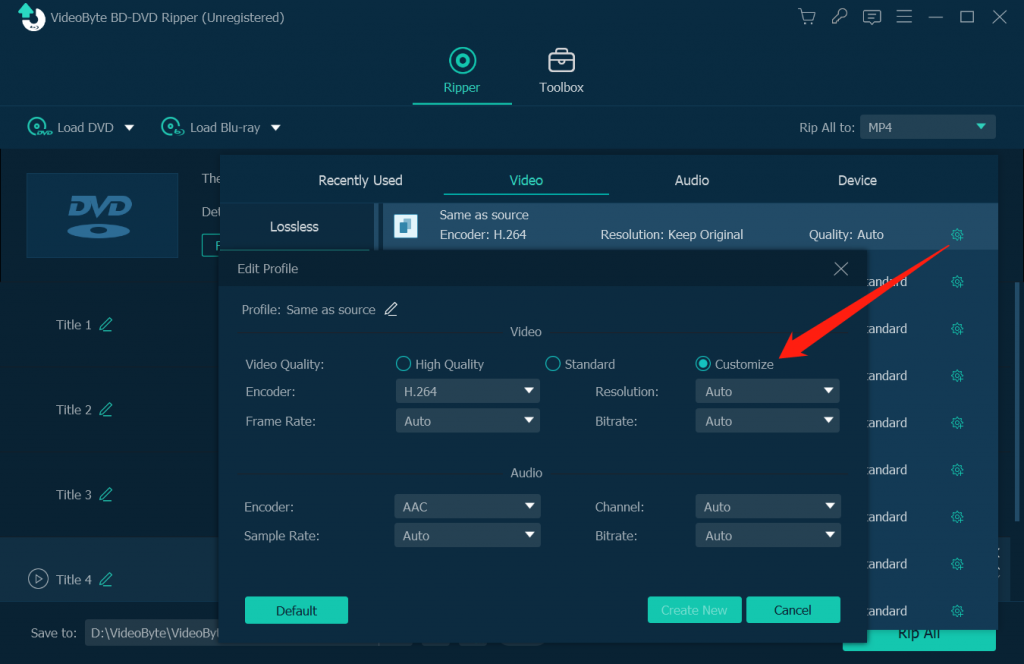
In the pop-up window, you can custom video quality, frame rate and bitrate. To balance file size and video quality, you’d better select 24fps which is determined to be the minimum speed needed to capture video and maintaining realistic motion. As for the bitrate, you can choose as per your need or select “Smart Match” to ensure the proper video quality. After that, tap on “Create New” to save your operation.
Step 4. Select Subtitle and Audio Track
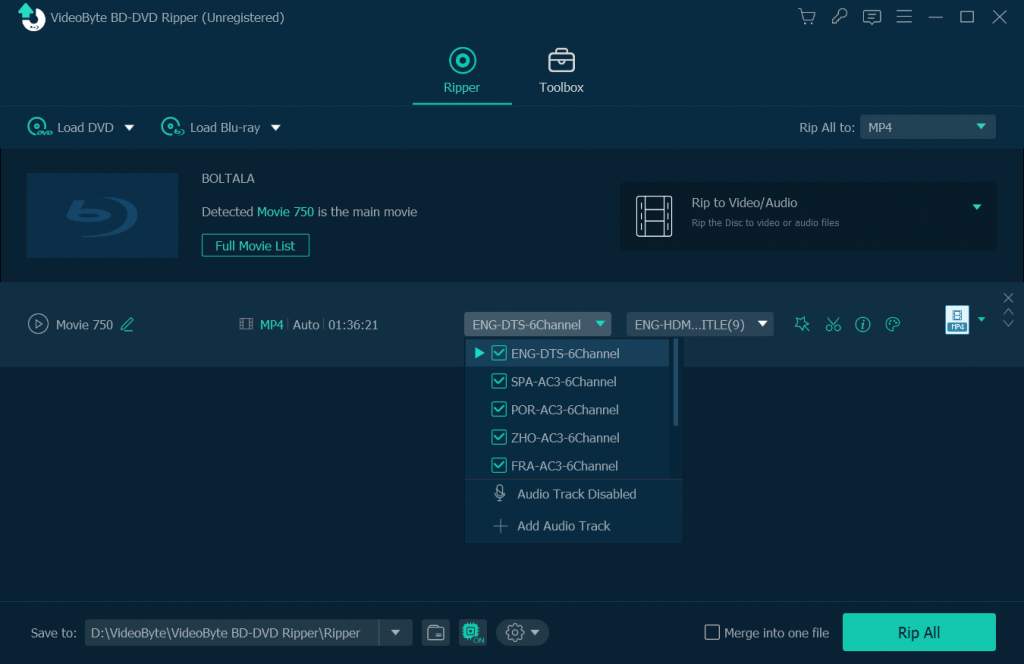
Now we turn to the main interface. In the information column, you can select subtitle and audio track. For reducing the video file size, choose fewer audio tracks and subtitles, the better.
Notice:
Only when you set “MKV Lossless” as the output format can you keep all the audio tracks and subtitle (Mac version can only preserve one hard-coded subtitle in the converted file.). If you choose other format, all the audio tracks can be kept but only one subtitle can be chosen.
Step 5. Rip the Movie Disc to Digital Video
The last step is coming. Click the button “Rip All” on the left bottom corner and wait for minutes. A smaller video file is completed.
If you want to get the DVD/Blu-ray movie smaller, you can go to “Toolbox” > “Video Compressor ” to make it smaller. This is all about ripping DVD/Blu-ray disc to digital video with proper file size by VideoByte BD-DVD Ripper. If there is any question, please feel free to leave a comment below.