


"I want to keep my MKV videos in Blu-ray discs losslessly because many media players can't support them. Is there any way to teach me how to burn MKV to Blu-ray by myself?"
Although MKV delivers great uncompressed quality to encode videos, audio, and also subtitles in one single container, its incompatibility with many common media players remains an issue. So you may wonder burning MKV to Blu-ray for keeping the great viewing experience or even enhance it.
Actually, when you get reliable software, it won't be a tough task. Now, take the 5 methods to easily convert MKV to Blu-ray on your desktops!
Part 1. How to Burn MKV to Blu-ray Disc with VideoByte DVD Creator
To burn MKV to Blu-ray, a powerful tool like VideoByte DVD Creator is essential. With great compatibility, the software can easily support burning nearly all mainstream video formats such as MKV and other popular ones such as MP4, MOV, AVI, etc. to Blu-ray discs/folders with customized menu templates without hassle.
VideoByte DVD Creator supports up to 4K video resolution, ensuring your videos retain their original quality during the burning process. It's an excellent choice for both standard and 3D MKV files. If you're struggling with the typically long burn times associated with large MKV files, VideoByte DVD Creator offers up to 6X faster speeds than standard tools. This lets users quickly and efficiently burn even large batches of MKV files. This blend of quality and speed makes VideoByte DVD Creator our top recommendation for converting MKV to Blu-ray.
Another standout feature of this powerful MKV to Blu-ray converter is its ability to create Blu-ray discs complete with customizable menus. Users can choose from a variety of built-in menu templates, which can be further customized with personal images, background music, and text. This functionality allows users to save it as a template for future projects, making it easy to maintain a consistent, high-quality style across all the Blu-ray creations.
- Create Blu-ray/DVD discs of all types from videos of most mainstream formats;
- Preset templates and menus to create unique Blu-ray discs;
- Additional video adjustment features for you to further edit videos before burning;
- Available to add and customize both audio tracks and subtitles as you desire;
Here is a guide to show you how to burn MKV to Blu-ray disc with 4 steps, simple and effective.
Step 1. Insert Blu-ray Disc to Prepare to Burn MKV Files
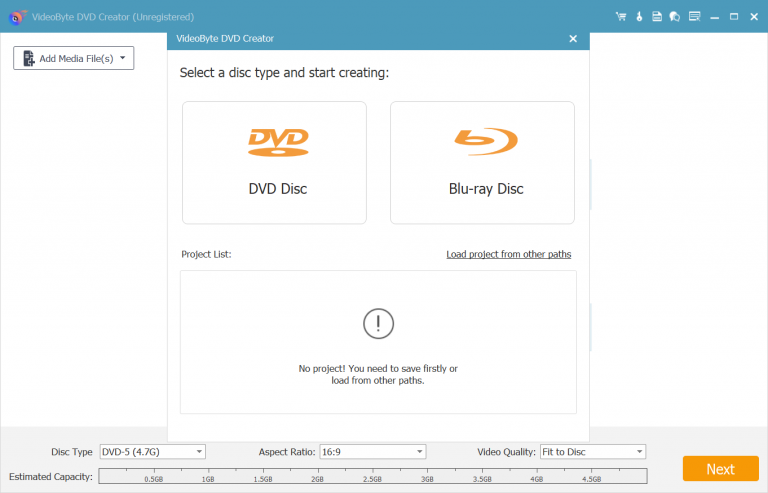
Download and install VideoByte DVD Creator on your Windows computer and launch the program. Before creating a Blu-ray disc, make sure that you can see the interface as below.
Then choose "Blu-ray Disc" to start creating. After that, connect your computer to Blu-ray drive and insert a blank disc.
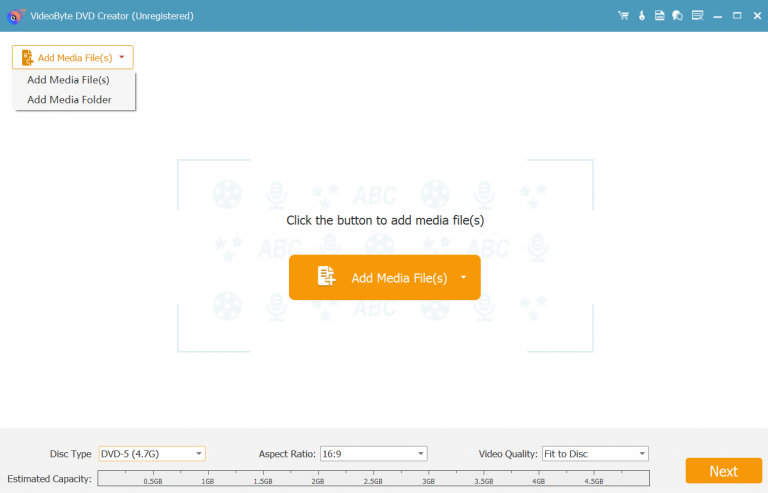
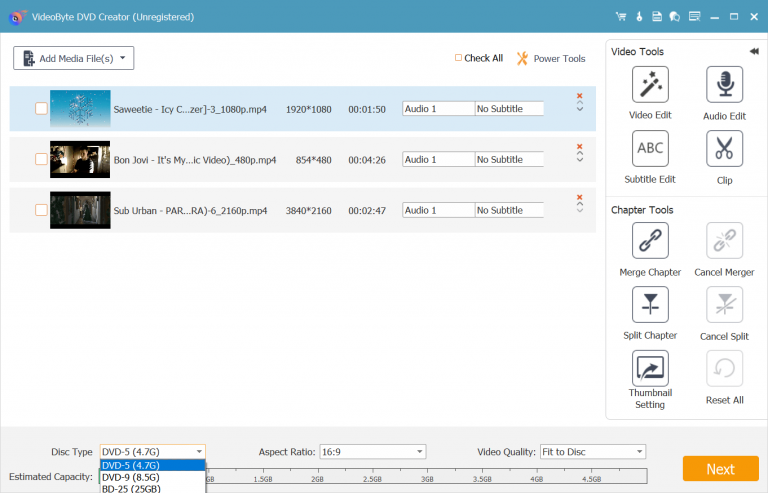
Step 2. Add MKV Videos
Click "Add Files" to import your MKV files into the software. If you have a folder of videos, you can just add the entire folder to burn MKV to Blu-ray discs.
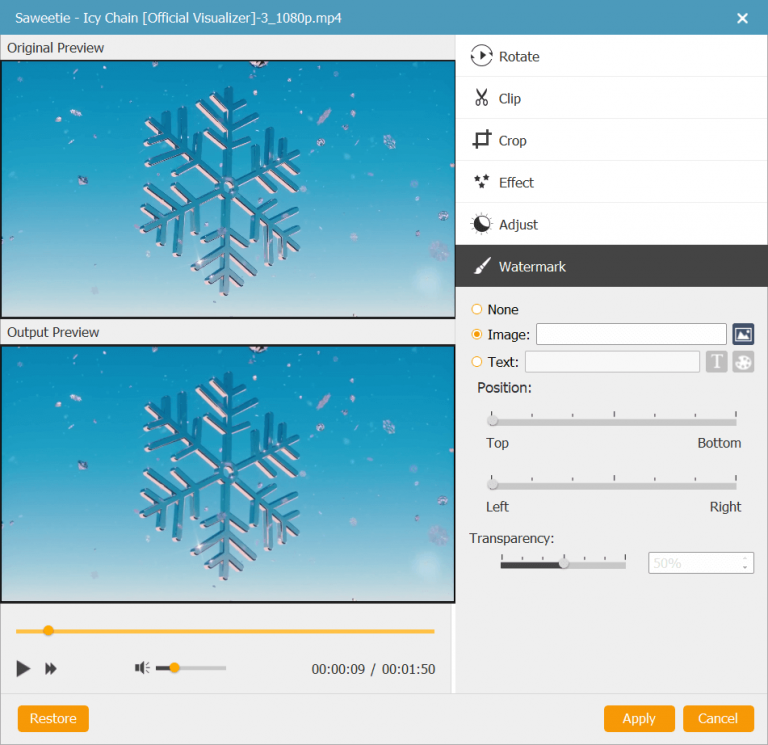
Step 3. Edit Videos Before Burning
(1) In order to make your own unique Blu-ray disc, you are able to click "Video Edit" button to rotate, clip, crop, add effects, and adjust videos from the pop-up windows.
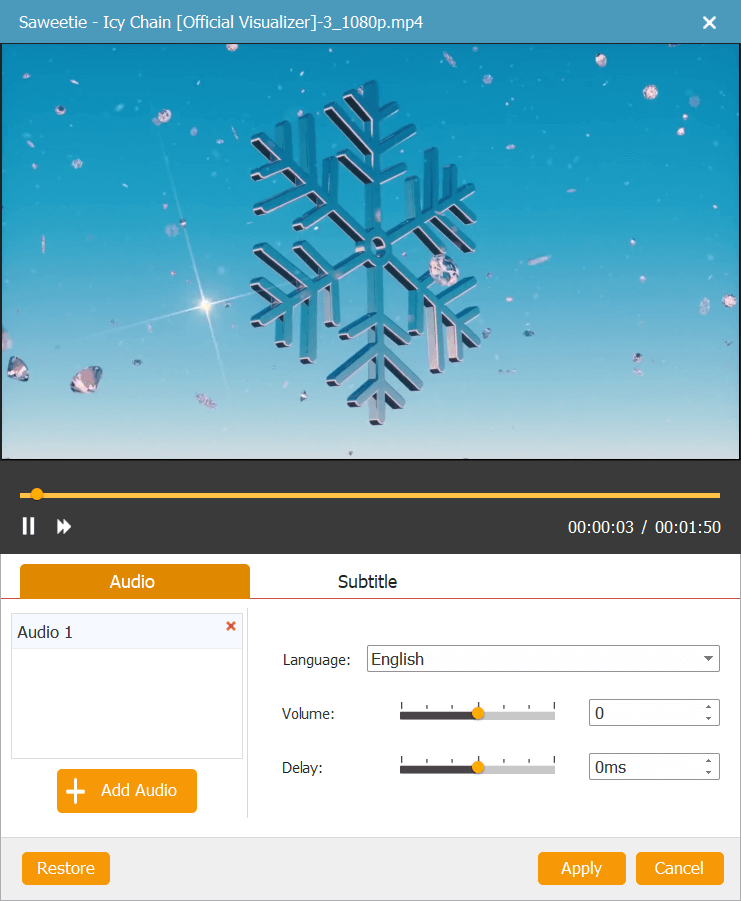
(2) Click "Audio Edit" to add other audio tracks into the video by choosing the button of "Add Audio" in the "Video Tools" bar.
(3) You are able to "Merge Chapter", "Cancel Merger", "Split Chapter", "Cancel Split" from the "Chapter Tools" or adjust "Thumbnail Settings". From the window of "Thumbnail Settings", you can "Intercept the current video screen as thumbnail" or "Upload a local image as thumbnail".
(4) Additionally, VideoByte DVD Creator offers customizable menu options. You can choose from a variety of free templates with themes like weddings, holidays, travel, and more. You can also add background music, and adjust the menu background to your preference.
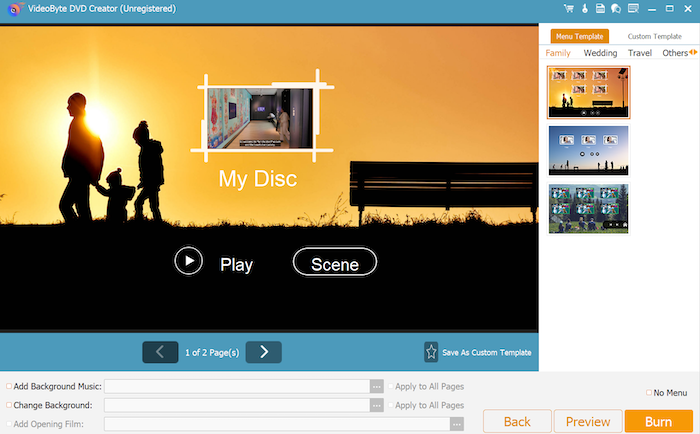
The above editions are optional to you. You can choose the one according your requirement to make your special Blu-ray video.
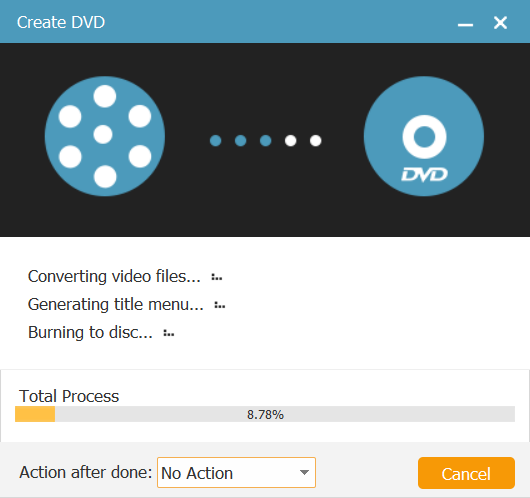
Step 4. Burn MKV to Blu-ray Disc
After all the settings, click "Burn" to continue choosing the "Burn Engine" or just select burning to ISO here. Lastly, you need to click "Start" to burn MKV to Blu-ray disc right away.
Part 2. Other 4 MKV to Blu-ray Converter to Burn MKV File
Despite the best MKV to Blu-ray burner recommended above, here are 4 more converters provided as your backup to burn MKV to Blu-ray without hassle. Now, also grasp them and compare to select your most ideal pick to convert MKV to Blu-ray.
ImgBurn - Free
As an open-source Blu-ray burner, ImgBurn is a great free Blu-ray creator for you to burn MKV to Blu-ray. With its classic interface and direct burning options, the MKV to Blu-ray burning just can be very simple. While it doesn't offer advanced output settings or video adjustment features found in other premium software, ImgBurn excels in its straightforward approach, providing a clean solution for those who need to get work done efficiently. Check our post: How to Use ImgBurn to Burn Any Videos to Blu-rays.
However, ImgBurn has some notable limitations. It is only available on Windows, leaving Mac users to look for other free Blu-ray creators. Its burning speed is relatively slow compared to other tools, and the user interface can be somewhat complex, requiring users to spend time learning how to use it effectively. Additionally, ImgBurn cannot create custom menus for your Blu-ray discs, which may be a drawback for those looking to add a professional touch to their projects.
Despite these challenges, it remains a go-to option for users who need a straightforward, no-cost MKV to Blu-ray converter for basic burning tasks.
How to burn Blu-ray via ImgBurn:
Step 1. Ensure your MKV files are ready and that you have a blank Blu-ray disc inserted into your Blu-ray drive.
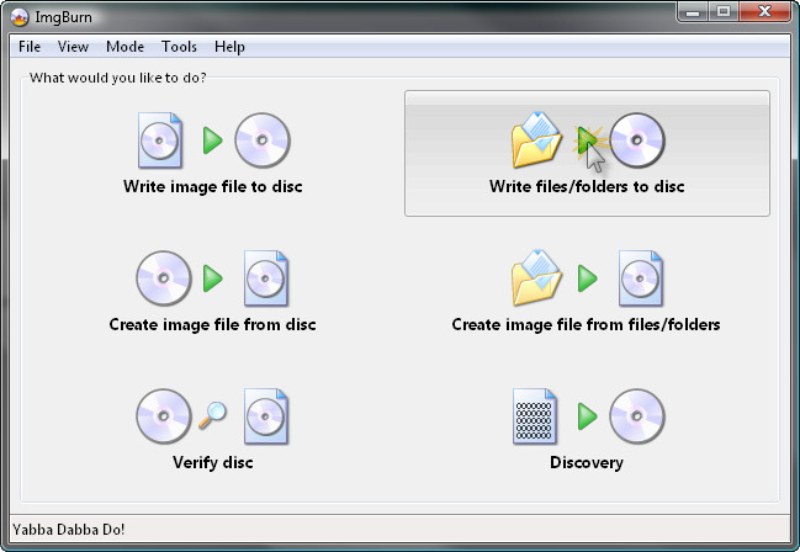
Step 2. Open ImgBurn. From the main menu, select "Write files/folders to disc" to create a Blu-ray disc from your MKV files.
Step 3. Add the MKV files or the folder containing your MKV files as the Source. Then from the "Destination" options, select your Blu-ray drive as the destination.
Step 4. Under the "Option" tab, double-check that the file system is set to "UDF" and the UDF revision is set to "2.50," which is standard for Blu-ray discs.
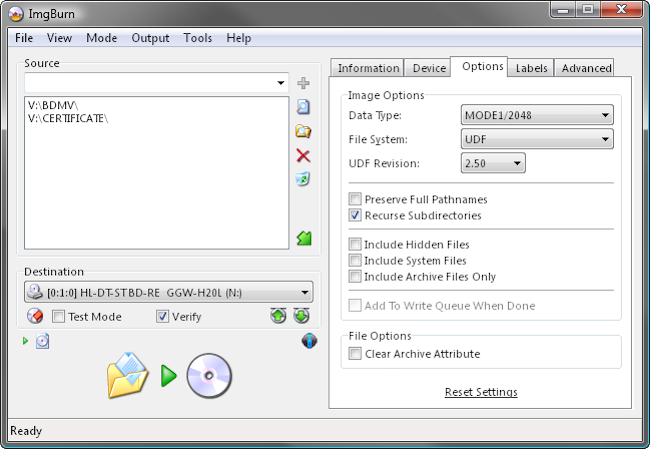
Step 5. Once everything is set up, click the "Build" button at the bottom of the window. ImgBurn will create an image file of your MKV files and begin burning it to the Blu-ray disc.
Consider switching to VidoeByte DVD Creator. It offers a much smoother, faster experience, with an intuitive interface that's easy to navigate. Plus, VideoByte DVD Creator provides advanced features like menu customization, making it a superior choice for anyone looking to efficiently burn MKV files to Blu-ray.
iSkysoft DVD Creator - Straightforward
Developed for both Windows and Mac desktops, iSkysoft DVD Creator also provides a hassle-free way for you to burn MKV to Blu-ray just by very easy clicks. You will clearly view the on-screen instructions from its intuitive interface.
After importing the MKV videos to the software, you then can adjust menus for them and further customize settings for previewing how the burned Blu-ray Disc will look like. Finally, give a go and iSkysoft DVD Creator will process the DVD burning for you.
However, some users may feel unsatisfied with its provided editing features with very limited templates and themes to select, for the reason that iSkysoft DVD Creator has simplified most of its function to ensure faster performance. However, if you desire more video editing or adjusting features, this MKV to Blu-ray converter may not be the best option for you.
How to burn MKV to Blu-ray on Mac via iSkysoft DVD Creator:
Step 1. Insert a blank Blu-ray disc into your Mac's Blu-ray burner and open iSkysoft DVD Creator on your Mac. Click the "+" icon or drag and drop your MKV files directly into the program. You can add multiple files if needed.
Step 2. (Optional) Before burning, you can edit your MKV files using the built-in editor. Trim, crop, add watermarks, or apply effects as needed. Additionally, iSkysoft DVD Creator allows you to customize your Blu-ray disc with menus. You can choose from a variety of templates, add background music, and set chapters.
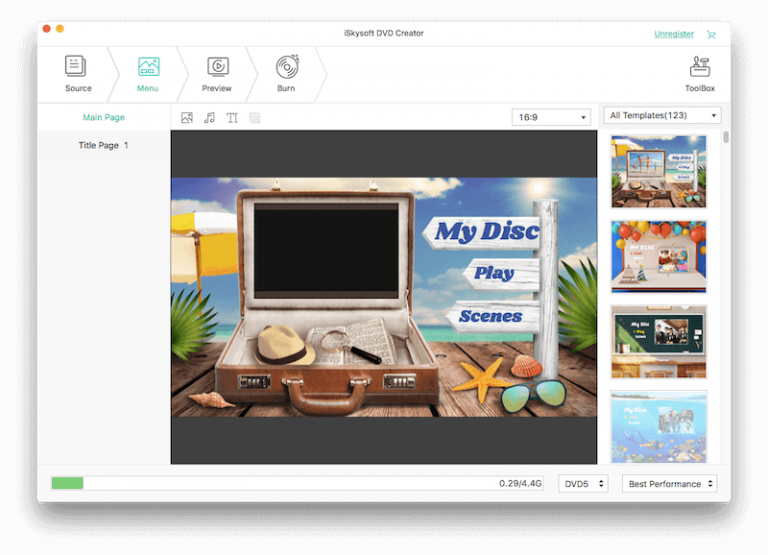
Step 3. Once your videos are ready, choose Blu-ray as your output format. Ensure that all settings, such as video quality and aspect ratio, are correctly configured.
Step 4. Click the "Burn" button. You will be prompted to choose between burning directly to a disc, creating an ISO file, or saving it as a DVD folder. Select "Burn to Disc" and begin the burning process.

Leawo Blu-ray Creator - Versatile
Another hassle-free way to burn MKV to Blu-ray is by using Leawo Blu-ray Creator, an easy-to-grasp software providing a simplified process to help you complete the task with ease. Despite converting MKV to Blu-ray, this software is also compatible with 180 more video formats and can help you burn them to Blu-ray and even DVD, ISO along with 40+ templates and 6 effects. You are able to get the whole burning completed within a short time.
But you need to pay attention that, as Leawo Blu-ray Creator is not a freeware at all, you will be limited to use its burning functions. To unlock and remove all the limitations, further subscription for the registered version is required.
How to burn MKV to Blu-ray via Leawo Blu-ray Creator on desktops:
Step 1. After opening the software, select the "Burn" > "Blu-ray" option from the top menu and select to import MKV videos you desire to burn to Blu-ray to its interface.
You are required to insert the blank Blu-ray disc to the computer first.
Step 2. Once all MKV videos are imported, move down to the bottom of the workplace and you are able to preset some burning settings before processing the creation to convert MKV to Blu-ray.
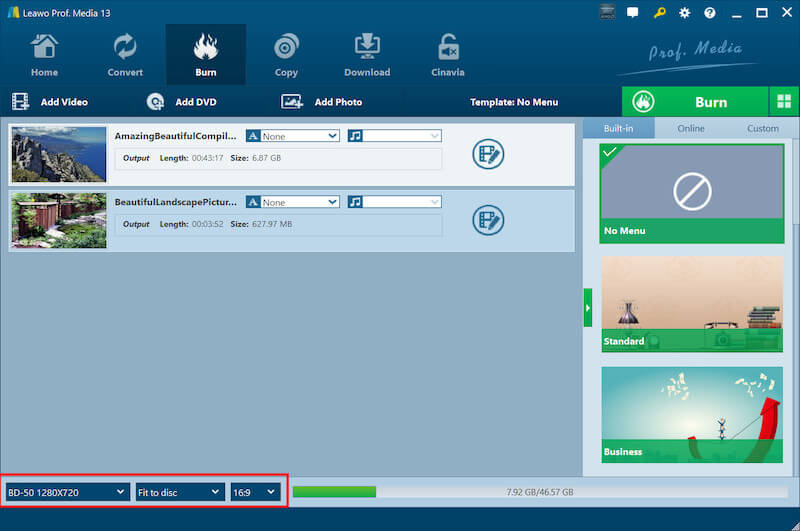
Step 3. Finally, simply hit the green "Burn" icon in the upper-right corner, then Leawo Blu-ray Creator will process to burn MKV videos to the inserted Blu-ray disc for you right away.
Nero Burning ROMNero Burning ROM - Fast
For finding freeware to burn MKV to Blu-ray, Nero Burning ROM is also one of the best options you are able to trust. The software will ensure high-quality data recording functionality to provide a smooth experience for you to convert MKV to Blu-ray, and also other DVD standards or as audio CDs. With only one software installed, you are able to process different types of disc burning on desktops without hassle.
However, compared with other easy-to-grasp DVD creators, a drawback of Nero Burning ROM should be its classic interface which would be a bit confusing for first-time users to get started. Also, its free trial only lasts for 15 days with certain limitations existed.
How to use Nero Burning ROM to burn MKV to Blu-ray:
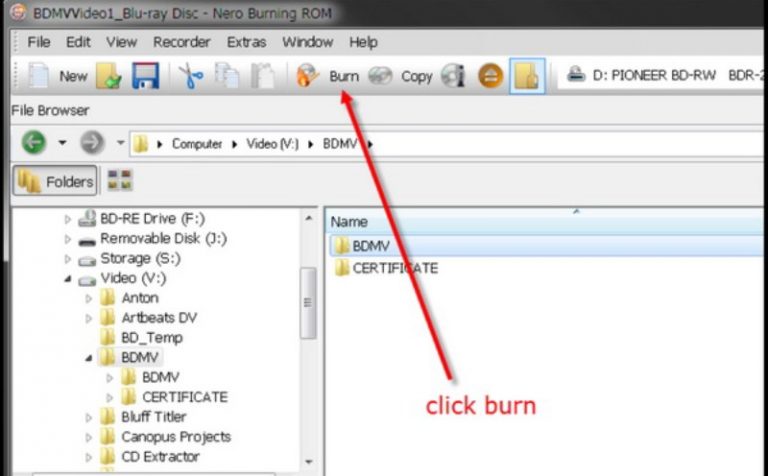
Step 1. Launch the well-installed Nero Burning ROM on your desktop, then also insert the blank Blu-ray Disc to the device for enabling the software to detect it.
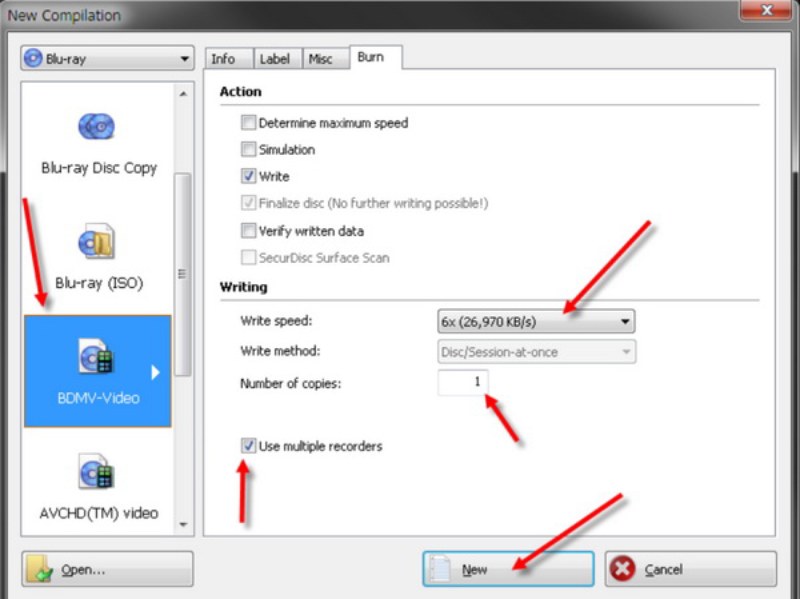
Step 2. Now, in Nero Burning ROM, select "BDMV-video" preset writing options such as the speed, and number of copies. Click "New" to create a new project.
Step 3. After then, continue to import MKV files to the software for preparing to burn them to your Blu-ray Disc.
Step 4. Finally, simply click the "Burn" icon on the top menu bar, and then Nero Burning ROM will process the burning for you to convert MKV to Blu-ray.
FAQ of Burning MKV Files to Blu-rays
How much data can you burn from MKV files to a Blu-ray disc?
The amount of data you can burn from MKV files to a Blu-ray disc depends on the disc type. A standard single-layer Blu-ray disc holds up to 25 GB, while a dual-layer disc can store 50 GB. For larger needs, triple-layer discs hold 100 GB, and quad-layer discs can store up to 128 GB. To estimate how many discs you'll need, divide the total size of your MKV files by the disc capacity. For example, if you have 60 GB of data, you would need two single-layer discs or one dual-layer disc. Always prepare a little extra to ensure you have enough discs.
Can Blu-Ray players play burned discs?
Yes, Blu-ray players can generally play burned discs as long as they are properly authored and finalized. Burned discs such as BD-R and BD-RE are compatible with most modern Blu-ray players. For reliable playback, consider using players like the Panasonic DP-UB820, Panasonic DP-UB9000, or Sony UBP-X700. These models are known for their broad compatibility and ability to handle various disc formats, including those you burn at home.
Conclusion
When there are optional ways for you to burn MKV to Blu-ray, you can compare and select the best method to process the conversion right away. For example, if you consider lossless MKV to Blu-ray burning at a quick speed, VideoByte DVD Creator offers the best help. Despite this, for any of you who desire freeware, ImgBurn can be a cost-free software you can trust. If you consider more editing options. iSkysoft DVD Creator is also considerable…
Hence, simply based on your demands and select the best option to burn MKV to Blu-ray without hassle!