Everyone loves HD video due to its high video resolution, superior sound quality and enjoyable viewing experience. If you have a DVD and you’d like to convert and rip DVD to HD video format for watching on your 1080p device or storing on your hard drive, whatever the reason, it matters a lot what tool you’ll take to be a perfect for the task. I did some research and belowed article will show you step by step on how to rip your DVD movie to HD video format with the best DVD to HD converter. Then read on.
Understanding HD Video Format
In the first place, I want to propagate some knowledge of HD video format. HD (high-definition) video is the video of higher resolution and quality than standard-definition video (SD), usually with a display resolution of 1280×720 (720p) or 1920×1080 (1080i or 1080p). All of the formats are widescreen 16:9 and display between 24 and 60 frames per second, which can give you the maximum high-definition experience with your 80-inch HDTV and high-resolution HTPC.
Reliable DVD to HD Converter You Can Get
Ripping DVD video to HD format with VideoByte BD-DVD Ripper is the best choice for you. It’s so powerful that you can use it to rip DVD to various HD video formats, including HD MPEG-4 video, HD WebM Video, HD H.264 TS Video, HD MOV Video, HD AVI Video, HD VOB Video, HD WMV Video and DivX HD Video etc. Besides supporting versatile HD video formats, it also allows you to rip DVD to almost all SD video formats, and even 3D video format.
To hold VideoByte DVD Ripper at hand let you enjoy colorful videos on your iPhone, iPad, iPod, Samsung, PS4, XBOX and almost all portable devices at anytime and anywhere.
This DVD to HD converter provides video editing and advanced parameters customization. With the friendly-use interface provided by this program, both novice and beginners can create a professional-looking HD video in minutes. Capture pictures and preview are supported as well. Why not try VideoByte DVD Ripper right now?
Free download the high quality DVD ripper:
Get Started to Convert DVD to HD Video Format
Now let’s see how to convert DVD to HD videos step by step. A video tutorial is also presented below.
Step 1. Load DVD File to the Ripper
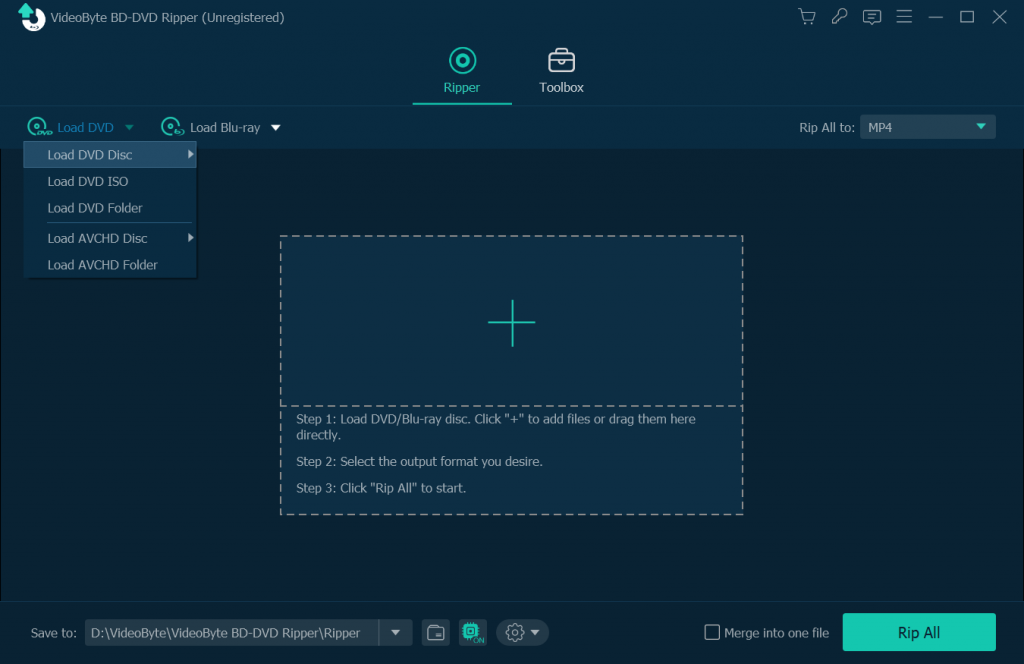
Install this DVD to HD ripper on your computer and run it. Then insert the DVD disc, go back to the main window of the program and click “Load DVD > Load DVD Disc” to import the file you want to convert.
Step 2. Choose HD (720P OR 1080P) Output Format
Next, click “Rip All to” button and choose an HD video format as per your needs. Every output format has a HD option.
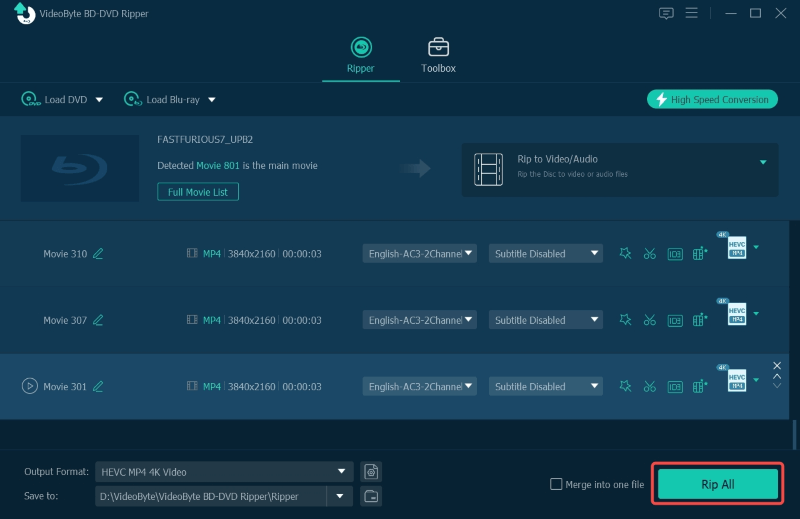
Note: Here you also can choose general 480p video, 4K Video, 3D Video and various preset formats.
Step 3. Edit for DVD to HD Video (Optional)
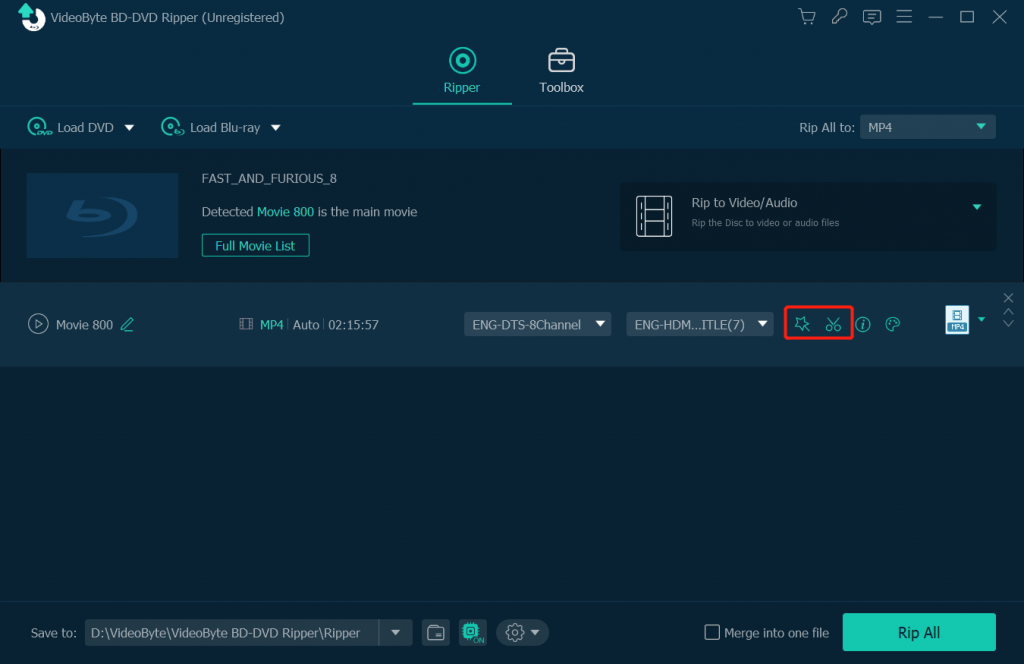
VideoByte DVD Ripper provides you with a built-in video editor, which can be accessed by clicking the “Edit” icon. Then you’ll be able to crop, rotate, add 3D or watermark, adjust effects etc. You can also click “Clip” to get different segment of the video by setting the starting time and ending time of each clip.
Step 4. Select Output Folder
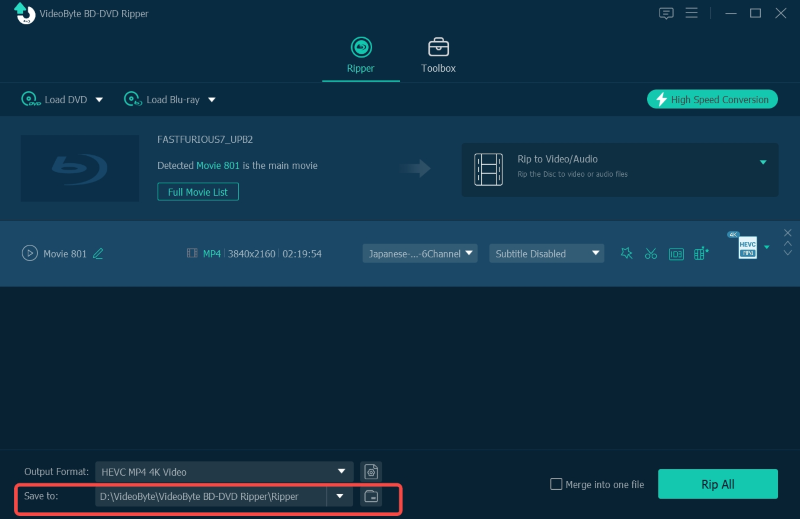
Go back to the main window, specify an output folder by clicking “Browse” button to save converted HD videos if you like.
Step 5. Rip DVD to HD Video
Once you are done with the entire setting and editing task, hit the “Rip All” button on the bottom-right to start burn your DVD to HD videos at very high speed.
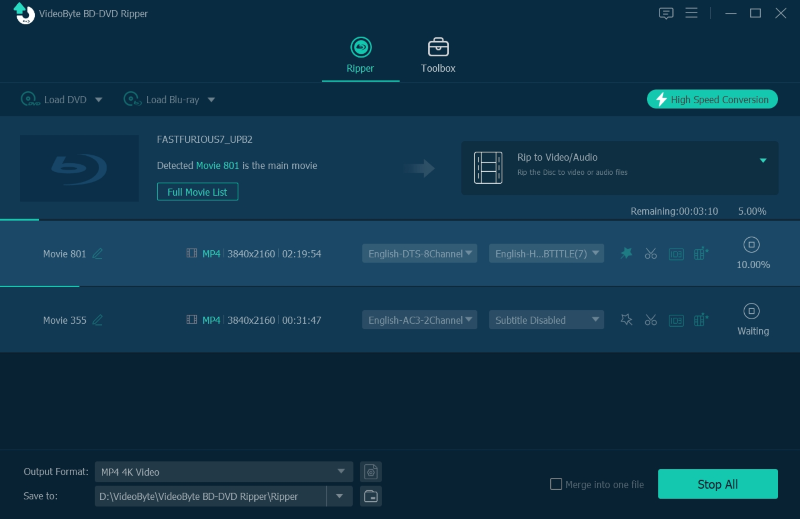
There you have it! The tutorial for converting your DVD into HD video format is pretty straight and simple with the VideoByte BD-DVD Ripper, now it can be shared with whomever you want.


